![]()
|
|
![]()
|
|
In this section you will build the basic discussion board functions - the ability to display, post, and reply to messages.
The first thing to do before creating any of the application's pages is to implement the user authentication system. In order to attract new members, the discussion board should be accessible and friendly, should present interest and should offer solutions. This way, viewing the messages will not require the visitor to have an account, but posting messages or replies will. The user authentication will use the user_usr table, as presented in the Planning section of this tutorial.
To build this section, follow the next steps:
Open the register page from the site root into Dreamweaver.
Open the InterAKT Control Panel and go to Login
Settings. This is where you will have to define how user authentication
will work on this particular application. The interfaces and settings
are similar to the ones presented in the Job
Site tutorial > User Authentication section, with the following
differences:
· Authentication
is based on username and password only, without the use of user levels.
Also, don't forget to check the encryption checkbox.
· On the
Database tab, configure all fields based on the existing columns, using
the name_usr column as username, and no level
column at all. Also, make sure you select the column randomkey_usr in
the Random key menu. This is used in the account activation process, to
prevent a user from activating the accounts of other users. The random
key will be attached to the URL for account activation.
· On the
User Levels tab, you only need to fill in the main redirect pages (the
ones on top of the user interface, without having to define pages for
each level - levels don't exist).
· The login
page is login.
· After successful
authentication, users must be redirected to the index
page.
· If the
login fails, users remain on the login page.
Once you've finished setting up the Control Panel options, press the OK buttons in each dialog box.
Back on the registration page, apply the User Registration Wizard, similar to what is shown on the User Authentication tutorial. Remember to remove the active_usr and randomkey_usr columns from the wizard's second step, and to check the Use account activation checkbox.
Once you're done with the wizard, close the page and upload it to the server. If you want, you can try it out and create an user account of your own.
When a user registers an account with the site, two e-mail messages will be sent to his e-mail address: an account activation message and a welcome message. To be able to send these messages, you need to configure InterAKT Control Panel > E-mail settings.
Next, you will create the login form, that allows registered users to authenticate to the forum. Open it in Dreamweaver and apply the Login Form Wizard to create the HTML form elements, as well as the activation and forgot password pages. An example of the configuration can be found here. Once you finish configuring and applying the wizard, save the login page and upload it on the remote server.
Finally, you should create a log out link, to allow users to safely exit the discussion board. You should follow the same steps as described here. Place the "Logout" link in the upper part of the view_messages page.
Once the user authentication section is complete, you will have to create the application's main page. This page will contain a list of all topics available on site, each with its description, and a link to show the associated messages. To keep things simple, the topic list will not be managed from the Discussion Board site. Adding new topics will have to be done in the database management software. Alternatively, you can create an administration section for the discussion board, as explained in another tutorial: Content Management System.
To create the application's main page, with the topic listing, follow the next steps:
Open the index file from the site root in Dreamweaver.
The page design is already created, containing a table with three rows and one column. The topic listing will be placed in the middle row and will display the topic title, description and a link to view the messages.
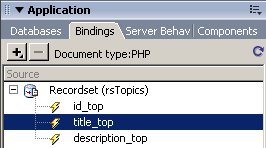
Before placing the elements on the page, you have to create a recordset that will retrieve all topics from the topic_top table. To create a new recordset, click the Plus (+) button of the Bindings tab and select Recordset (query).
In the dialog box that opens, select the connBoard database connection and the topic_top
table. Since you do not need to filter out any elements, you can click
the OK button to close the dialog box.

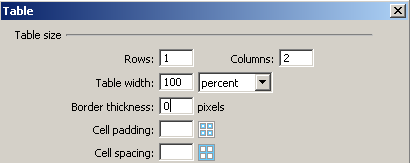
To display the topics in an orderly fashion, you
will have to create a table containing a single row and two columns
inside the main table's middle row.
In the first column, the topic title and description
will be displayed. Drag and drop their corresponding recordset fields
from the Bindings tab to the page.
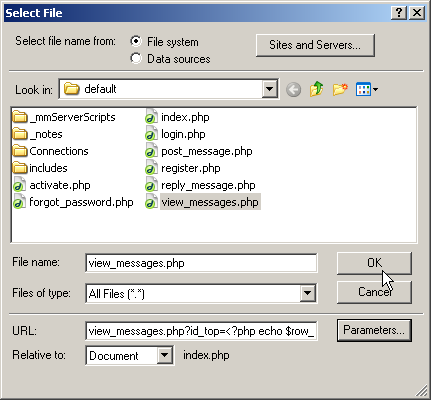
In the second cell, you have to create a link to the page that displays the messages: view_messages. Enter the link text [View messages] into the second cell. Select it and right click to display the menu. Choose Make link.
In the dialog box that opens, select the link's target page (e.g. view_messages.php) and then click on the Parameters button. This is needed, because the view_messages page will display all messages belonging to a single topic, and the topic's ID is passed as an URL parameter, to sort out only that topic's messages.
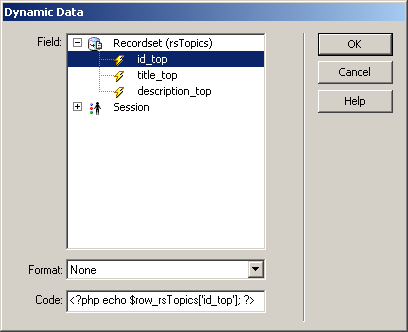
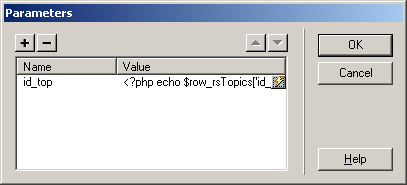
In the Parameters dialog box, enter the URL parameter's
name: id_top. For the parameter's value,
select the dynamic value id_top from the rsTopics
recordset created earlier, by clicking the lightning bolt icon.
The Parameters dialog box should look like this.
Click OK to confirm your settings.
The dialog box for configuring the link to the
view_messages page should look like this:
Click OK to apply your settings.
You might also want to apply a different formatting
style to the topic title, to differentiate it from the rest of the text.
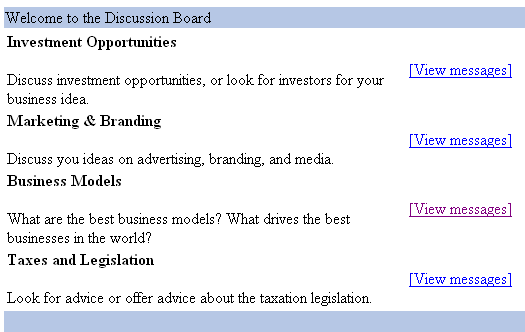
At this point, your page should look like this in Dreamweaver Design view:

However, if you try to preview this page in the browser, you will notice
that only the first topic is displayed. In order to display all topics,
you must apply a Repeated region on the table row containing the topic
title and description. Click on the <tr>
tag in the Tag selector to select that row:
![]()
Apply the Repeated region command from
the Application tab of the Insert
bar.

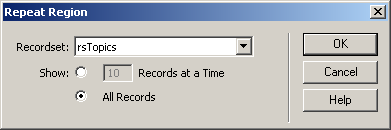
Configure the dialog box to display all records
of the rsTopics recordset and click the Ok button to close the dialog box.
Save the page and upload it to the remote server.
When you preview it in the browser, it will display the list of topics
from the database script delivered with this tutorial.
You have now completed the home page of the Discussion Board, which displays a list of topics. Next, you will create pages that allow viewing and posting messages in a topic.
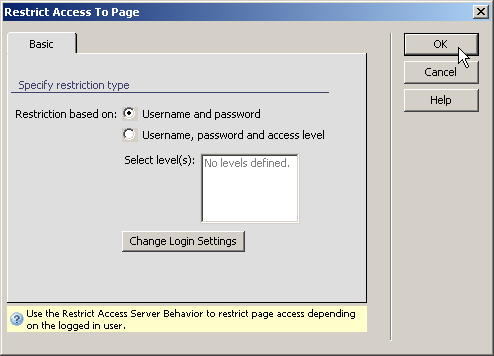
Before creating the message viewing page, open the post_message and reply_message pages and apply the Restrict Access to Page server behavior on each of them. This will prevent unregistered users from adding messages to the Board. This server behavior can be accessed from the Server Behaviors tab > + > MX Kollection > User Login. Configure the server behavior to restrict access based on username and password only, as shown in the image below:
After configuring the server behavior on both pages, you can move on and create the page that allows users to view messages associated to a certain topic.
This section contains the following topics: