![]()
|
|
![]()
|
|
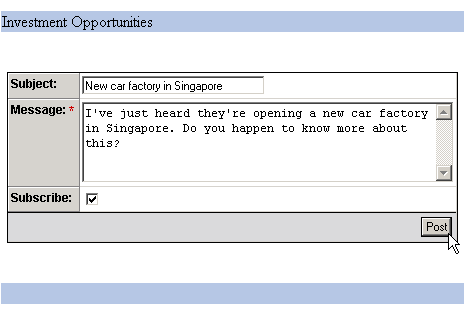
In this section of the tutorial, you will learn how to build the page that allows users post a new message in a certain topic. The page is accessed through the "Post message" link on the view_messages page, and passes to the post_message page the id_top URL parameter. This parameter contains the identifier of the topic to which the message will belong.
The value of the topic ID will be stored in the idtop_msg column of the message_msg table.
To allow users to post a message, you need to create an insert form, that takes user input and adds it to the message_msg database table. To build the page, follow the next steps:
Open the post_message page in Dreamweaver.
The layout is already created, containing the table with header and footer. You should first add the topic title to the table header, as shown in the previous topic in one of the last paragraphs.
Next, click in the table's middle row. This is where you will place the actual form that takes user input and adds the message to the database. Launch Insert Record Form Wizard, from the MX Kollection tab of the Insert bar. The wizard will generate the form and the insert transaction for you. Configure it as described next.
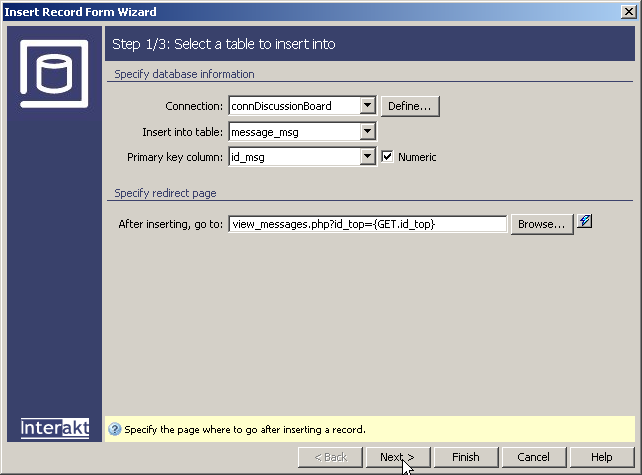
In the first step, select the database connection
you've created at the beginning of this tutorial (connBoard),
the table to insert into (message_msg). After
posting the message, users should be redirected to the view_messages page,
and the ID of the topic should be passed to it as an URL parameter. Otherwise,
the page will be blank. To add the URL parameter to the page, without
actually writing the code yourself, you will use the InterAKT Dynamic
Data. After you select the view_messages page in the text field labeled
"After inserting, go to". Next, type the following text after
the page name:
?id_top=
Finally, click the blue lightning bolt icon:

The InterAKT Dynamic Data window opens, where you need select the type
of variable, and enter its name as shown below:
Click OK to return to the first step
of the Insert Record Form Wizard, which
should look like in the following image:
In the second step, you have to configure what
table columns to use, and what values to assign to each:
· Remove
the idmsg_msg and id_init_msg
from the field list. These fields are not needed at this time. The idmsg_msg is only needed when replying (which is
not currently the case), and the id_init_msg
field will receive its value after the transaction.
· Set the
idtop_msg field to be displayed as Text,
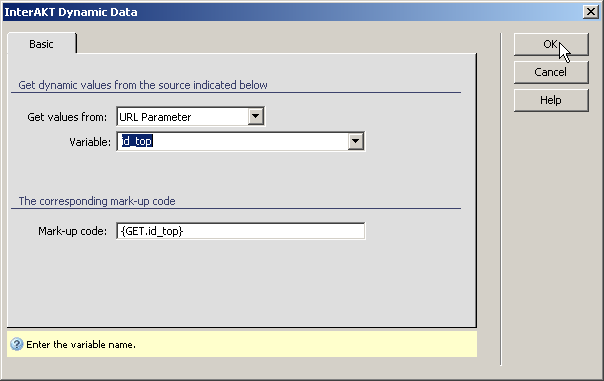
and set its Default Value to be equal to the URL parameter named id_top. To do that, click
the InterAKT Dynamic Data
icon, then in the dialog box that opens, in the Get
values from drop-down menu choose the URL
Parameter option and enter id_top in the Variable
field.
·
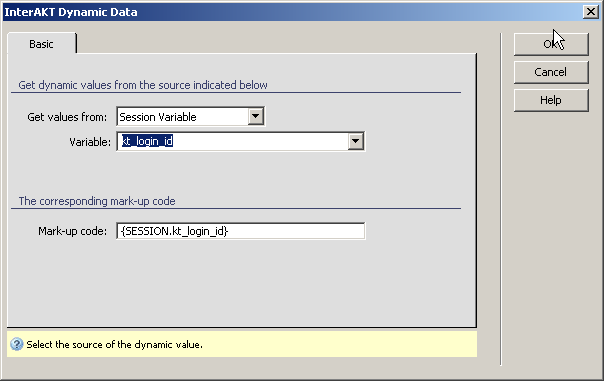
The idusr_msg field must be set as Text,
with the default value equal to the session variable kt_login_id.
Click the blue lightning bolt icon to access the InterAKT
Dynamic Data window and select the session variable kt_login_id,
as seen in the image below:
· The date
should also get a value automatically, in order to store the date and
time when the message was posted. Set the field to display as text also,
and for the default value, use the {NOW_DT}
mark-up code. This InterAKT
Mark-up will be replaced at runtime with the current date and time.
Note: If you are using a Microsoft Access
database, in the Submit as drop-down menu,
for the date_msg column, another option will be available: Date
MS Access. Select this option when submitting the date.
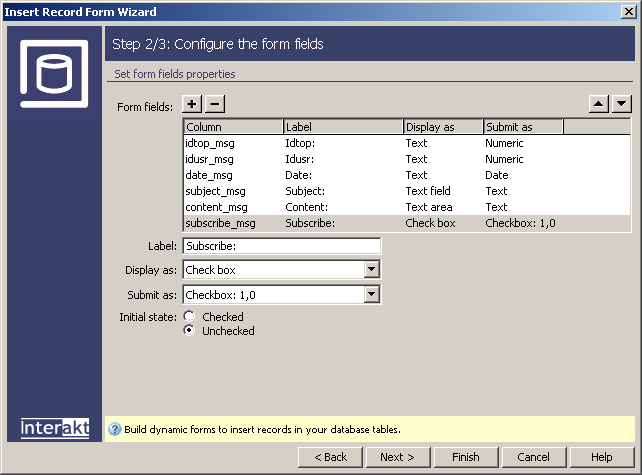
· The message
Subject will remain a text-field, but the
Content should be set as a text area.
· The subscribe column is stored as a 1 or 0 value. Therefore,
you should display it as a checkbox and submit it as a Checkbox:
1,0. Step 2 of the wizard should be configured as in the following
image:
Move to the next step, by pressing the Next
button.
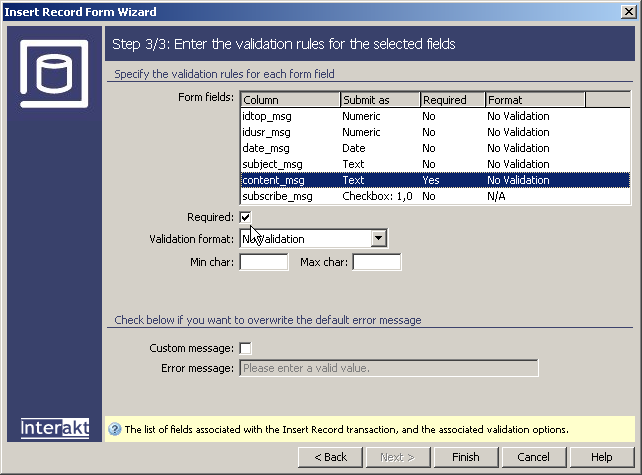
The third step requires that you have MX
Form Validation installed (if you do not have the MX
Kollection bundle or the ImpAKT bundle).
Otherwise, step 3 will not appear at all. This is where you can define
validation rules for any of the fields involved in the transaction. It
is a good idea to make the Content field required. Otherwise, users might
be able to post empty messages:
To apply the actions and dismiss the wizard window, click the Finish button.
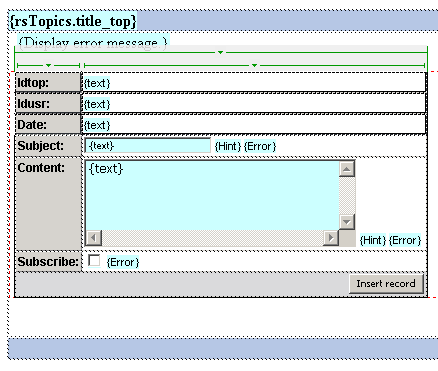
In Dreamweaver, the HTML form will be displayed in the table's second row, and the necessary server behaviors will be added to the Server Behaviors tab. If you need to edit any of them (the Insert transaction, or the Validation options), simply double-click their names in the tab and the dialog box will open.
Since the idtop_msg,
idusr_msg, and date_msg
should not appear in the HTML form, select these three fields in the Dreamweaver page and press the Delete
key. They are not removed from the Insert Transaction,
but only from the HTML form. The idea is to have their values set automatically
by the transaction, but not to make them visible to users.
At this point you can already add new messages to the board, in any topic that you want. However, the reply does not work properly at this point. This happens because the first message in the thread must pass its ID to all of the reply messages in the same thread. This ID is stored in the id_init_msg column of each message. For new messages (i.e., messages that are not replies to existing ones), the ID of the initial message must be identical to the value of the primary key.
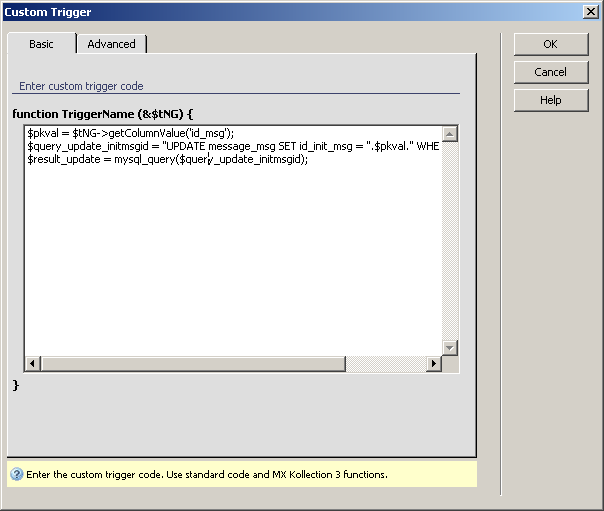
The id_init_msg field was initially removed from the insert transaction, when you applied the Insert Record Form Wizard. It must have the same value as the ID of the newly inserted message. However, the primary key of the new message is not available until the message has been actually inserted. Therefore, you will have to create a custom trigger that retrieves the ID of the message that has just been inserted, then updates the message by adding the same value for the id_init_msg field.
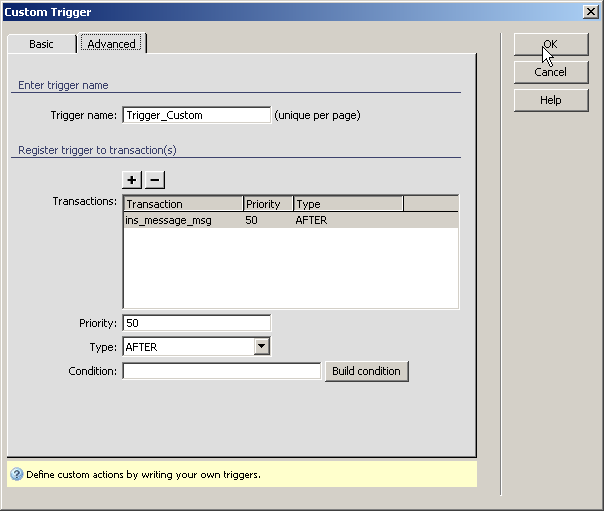
To create the Custom trigger that will update the value of the id_init_msg with the value of the primary key, follow the next steps:
Access the Custom Trigger server behavior from the Server Behaviors tab > +> MX Kollection > Forms.
For ColdFusion,
you need to perform some additional steps after applying the Custom
Trigger:
· Switch
to code view in Dreamweaver.
· In the
Server Behaviors Tab of the Application
panel, click the Custom Trigger you've just
created. This will select the code corresponding to the trigger in Dreamweaver
code view.
· Before
the opening <cfscript> tag that belongs to the trigger, you must
add the following code:
<cffunction name="UpdateMessage">
<cfargument name="sql" type="string" required="true">
<cfargument name="connection" type="string"
required="true">
<cfquery datasource="#connection#">
#PreserveSingleQuotes(sql)#
</cfquery>
</cffunction>
<cfset request.UpdateMessage = UpdateMessage>
· This code
block declares the UpdateMessage function that is used by the Custom Trigger
for executing the update SQL query.