![]()
|
|
![]()
|
|
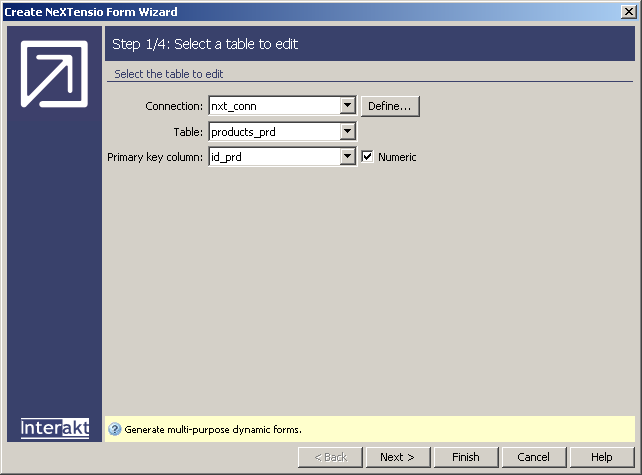
In order to create a form that allows performing insert and update operations on a given table, you can use the Create NeXTensio Form Wizard. It is a good pair to the NeXTensio list, as it can be used to perform multiple operations based on the existence of an URL parameter. The wizard adds all the elements needed in order to build a fully functional form that will perform all three operations: add, modify and remove records.
The Create NeXTensio Form Wizard is accessible from two locations:
This wizard will create several elements for you:
Before using the Create NeXTensio Form Wizard, you should have a correctly configured testing site, as it will be required for the database connection setup step.
The wizard contains 3 or 4 steps, depending on whether MX Form Validation is installed or not:
To set the dialog box options for the first step of the wizard, follow
the instructions below:
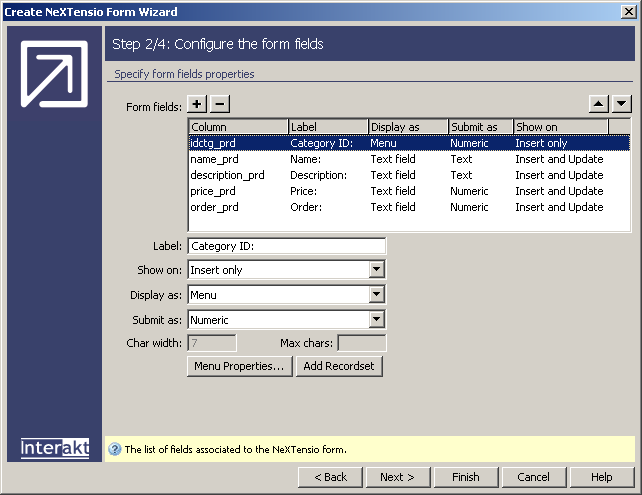
To set the dialog box options for the second step of the wizard, follow
the instructions below:
This step presents a way to validate all form elements. For instructions on completing this dialog box, see Form Validation in wizards.
To set the dialog box options for the fourth step of the wizard, follow
the instructions below:
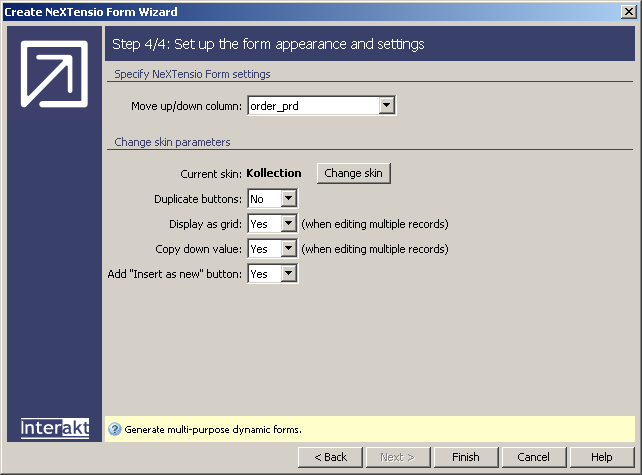
In the Move
up/down column drop-down menu select the numeric table column that
stores the records order. If you did not use an order field in your table,
leave this drop-down menu to the None value.
If you select a table column for the records order, the form will automatically
generate its value as being the maximum value of all existing entries
in the order column + 1 (plus one). This column will not be displayed
as a form field in browser (even if it was listed in the Form
fields grid on step 2) since it will automatically
get a value. This ensures that there will be no problems with the element's
order.
Through the NeXTensio list, this order
in the database can be easily changed.
Note: If you specified a table column in the Move
up/down column drop-down menu when creating the related NeXTensio
list, the same column must be selected in the respective drop-down menu
of the NeXTensio form. For technical details
about selecting the Move up/down column in
the NeXTensio list and form, please see
the following topic: Move up/down does not work for newly inserted records.
The Current skin
used in your site (in all the pages included, not only the current one)
has its name displayed in bold text. The Change
skin button offers the possibility of choosing another skin out
of the available ones (aqua, kollection, arktic, formal) or None,
if you don't want to use any skin:
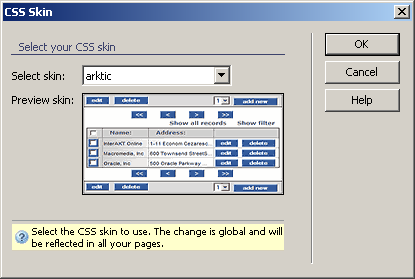
You can preview the chosen skin in the image provided along with the
selected skin. For more details, read CSS
Skins.
In the Duplicate
buttons drop-down menu select one of the 2 possibilities:
· Yes
- if you want the action buttons to be displayed both in the form's footer
and header.
· No
- if you want the action buttons to be displayed only in the form's footer.
This field is similar to the one with the same name in the NeXTensio
list.
In the Display as grid
drop-down menu select one of the 2 possibilities (when editing multiple
records):
· Yes
- if you want the records to be shown in a table that on each row displays
the values of a single record (each field in a cell).
· No
- if you want the records values to be grouped and displayed one group
below another.
In the Copy down value drop-down menu select Yes if you want the form to present a button through which the first value (when editing multiple records) can be extended and populate the cells below it. Select No if you don't want the first value to propagate.
In the Add "Insert as new" button drop-down menu select Yes if, in your form, you want a button that would insert a new record starting with the values stored in another one (values that are updated). This functionality is similar to one present in most software applications, namely the File / Save as property.
When you are done configuring the wizard, you can click the Finish button to close the dialog box and add all the elements into the page.
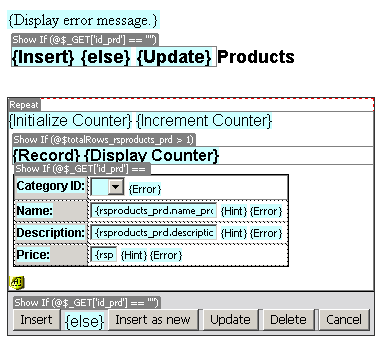
After the wizard configuration is finished, and the results are applied onto the page, several translators are shown in Dreamweaver's Design View. A translator is in fact visual aid corresponding to a code block behind the action, using simple to understand names (e.g. the Display error message translator is shown instead of the code that will display the error message - if any).
The Form title itself is part of a translator (the Show If translator),
because the same form can perform either an insert or an update, and the
correct title has to be shown for each. Translators do not appear in the
final page, when it is viewed in the browser. The page containing the
form created above, looks as in the following image:
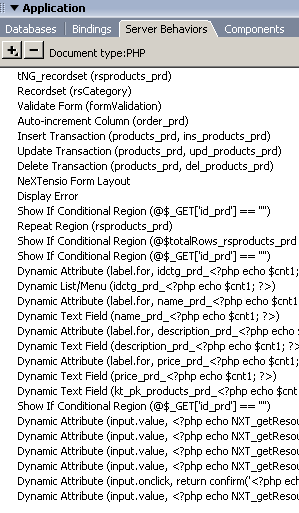
And this is how the Server Behaviors tab
of the Application panel looks like after
applying the wizard (with the settings above) in an empty page:
To change any of the form properties at a later time, you can double-click the NeXTensio Form Layout server behavior (inserted by the wizard) or apply the Manage NeXTensio Form Wizard command, accessed from the Insert bar -> MX Kollection tab.
To learn about the form's behavior in the browser, see NeXTensio Form browser behavior.
I need to see a list of all the records I have inserted. How do I do that?
Can I display some fields on insert, but not on update?
Can I use NeXTensio to build administration sections for my site?
How do I change a NeXTensio Form?