![]()
|
|
![]()
|
|
In order to customize the look of each site created with the help of MX Kollection 3, you can use CSS skins. The skin is globally available, covering most of the MX Kollection 3 generated elements: the NeXTensio list and form, the Transaction Engine forms (generated by the Insert/Update Record Wizards), the MX Widget elements.
To select the skin to use for the site, you must use the InterAKT
Control Panel -> CSS Skins entry. The user interface that opens
contains the following elements:
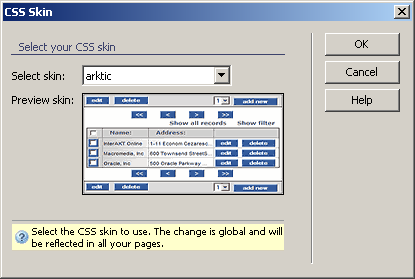
In the Select skin drop-down menu select one of the available skins. Skins are stored as folders in includes/skins, and if a new folder is added to the structure, it will be automatically recognized and added to the drop-down menu.
In the Preview skin area each skin's preview picture can be seen. The image to be displayed is stored inside each of the skins folders, and it must be created for each new skin. Otherwise, the preview feature will not work properly. Also, the file name is preview.gif.
The three buttons on the right of the interface
offer you the next functionalities:
· Click OK when you are done configuring the dialog box.
· Click Cancel to exit without changing the CSS skin settings.
· The Help button takes you to this help page.
In order for the change to take effect, you must upload the entire skins folder to the remote server.