![]()
|
|
![]()
|
|
In this section of the tutorial, you will build the article list. From the list you can add an article, and edit or delete an existing article. The easiest way to implement this is to use a NeXTensio list. The page that will contain this list is the admin/list_art page.
Before creating the actual list, you should remember that this page belongs to the administrative section of the site, and as such, not everybody should be allowed to access it. This is why the first thing to do in regards to the list_art page (besides opening it in Dreamweaver, of course) is to apply a Restrict access to page server behavior. You can open the Restrict Access to Page server behavior from the Server Behaviors tab >+ > MX Kollection > User Login. Configure it to restrict access based on username and password alone.
First make sure that you already have configured your Control Panel -> Login Settings to use the user_usr table for the content management system tutorial. If not, you should do so before continuing.
Now apply the Restrict Access to Page Server Behavior from the Server Behaviors tab > MX Kollection > User Login. Configure it similar to what is shown in the User Authentication tutorial, but using only the username and password.
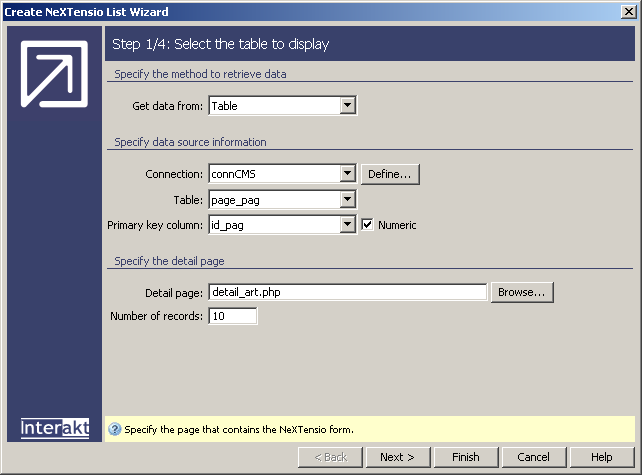
Once you've secured the page, you can move on and add the actual article listing. To do so, you will have to start and configure the NeXTensio List Wizard.
Click its button from the MX Kollection tab of the Insert bar, and configure it as follows:
In the first step, select the database connection you've created at the beginning of this tutorial.

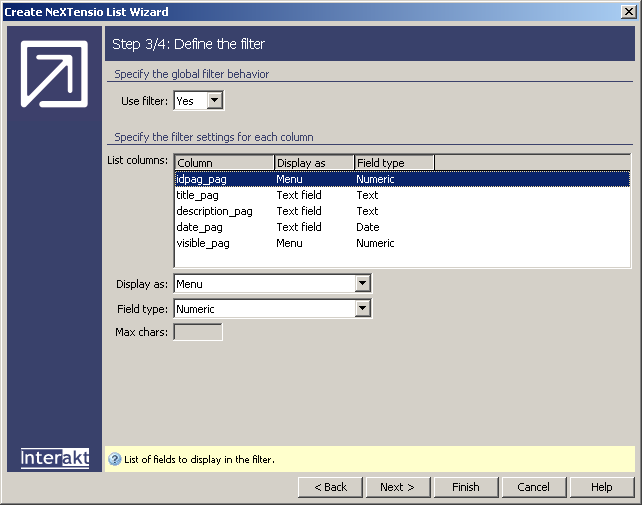
Each NeXTensio
List can have a row for filtering the list results. For the third step,
you can specify how you want the filters to appear. For some fields you
may want a text field, others a drop-down menu, checkboxes for boolean
values etc. The only change is made for the visibility field: set it to
use a Checkbox: 1,0 as filter element: when
the checkbox is selected, only visible (with the value 1 in the database)
elements will be displayed.
Note: If you are using a Microsoft Access
database, in the Submit as drop-down menu,
another option will be available: Date MS Access.
Select this option when submitting the date. See the
NeXTensio List Wizard user manual for more details.
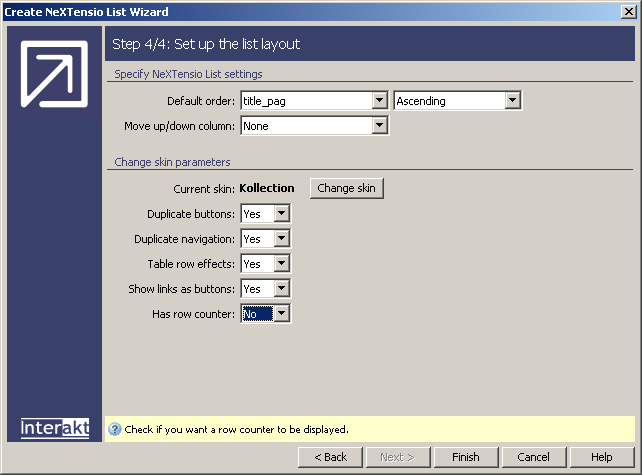
The final wizard
step is where you will find some display options for the list - skins,
row effects, and the possibility to have buttons and navigation above
and below the display list. Duplicating is useful if you plan to have
a long list, so the user will not have to scroll up or down.
When you click the Finish button, the
HTML elements, as well as some server behaviors
will be added to the page. Next to the regular table cells and links,
some form elements are added to allow filtering the list after different
criteria. This is how the page should look like in Dreamweaver:

If you try and preview the page in a browser, you will be redirected due to the Restrict Access to page server behavior. After you login however, you can access it.
While the list was being created, you've already implemented the second
objective: being able to delete several articles at a time. When the list
is generated, it contains checkboxes and buttons to facilitate multiple
deletions. Once the form page will be created, the delete operation will
become functional as well.
You can use the list's filter fields to show only elements respecting certain conditions. Through this list, sorting is also possible, by clicking on the column title. Once the list is sorted after a column, visual indicators will be displayed next to the title, to allow changing the sort type (Ascending or Descending).
After you've created the article listing by using a NeXTensio List, you have to create the list's counterpart: the NeXTensio Form which is used when links like add or edit clicked. This will be tackled in the next topic of this tutorial.