Login settings
This section of the control panel allows you to define all options regarding
the login action for your site in a single, unified location. You will
define everything from the table that stores the user data, to the session
variables used in the page.
The user interface is divided into four tabs, each allowing you to set
some specific options in regards to the login action:
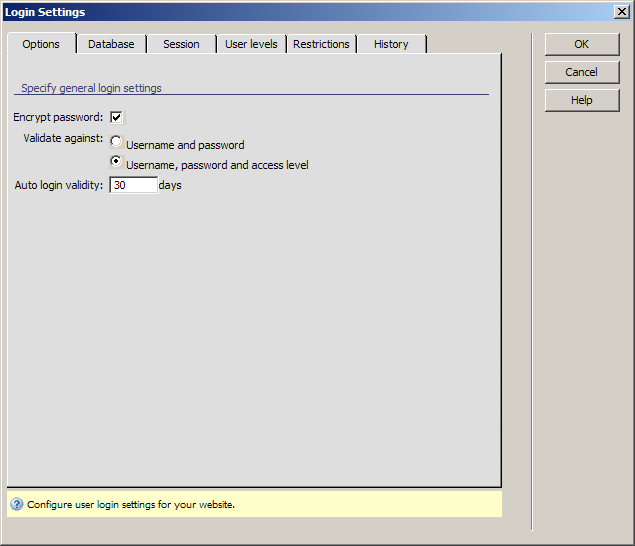
The Options tab
This tab allows you to set general options regarding the login action:
To configure this dialog box, follow the instructions below:
- With the Encrypt password
checkbox, you can decide whether to store the passwords as plain text,
or using encryption.
- In the Validate against
radio buttons, select what criteria will be used to validate the user
data: you can select between Username/Password
and the more complex Username/Password/Level.
- In the Auto login validity
text-box, enter the number of days for which the auto login feature will
be valid. After this period ends, users will not be automatically logged
in when they attempt to visit a page with restricted access, but will
be prompted to authenticate first.
Tip: The Auto login cookie lasts 30 days from the last visit
of the user. This means users who visit a website
daily are virtually never required to authenticate.
- The three buttons on the right of the interface offer
you the next functionality:
· Click when you are done configuring the dialog
box.
· Click to exit without changing the
login settings.
· The button takes you to this help page.
These buttons are common to all tabs of the
interface.
- Click on the Database
tab to continue configuring the .
The Database tab
This tab allows you to set up the database and table that stores user
data:
To configure this dialog box options, follow the next steps:
- In the Connection drop-down
menu, select the database connection used for your site.
- In the Table
drop-down menu, select the database table that stores user details.
- In the Primary key drop-down
menu, select the field that stores the primary key for the selected table.
- In the Username drop-down
menu, select the table field that stores the user names. The table column
should be set as a UNIQUE Key
in the database structure, to prevent duplicate entries that will lead
to a non-functional login.
- In the Password drop-down
menu, select the table field that stores the user passwords.
- In the E-mail drop-down
menu, select the table field that stores the user's e-mail address.
- In the Active drop-down
menu, select the field that stores the activation state for the user.
If no table column is selected in the drop-down menu, the Activation feature
will not be available for use in the current application.
- In the Level drop-down
menu, select the table field that stores the user level.
- In the Random key
drop-down menu, select the table field that stores the randomly generated
key used when activating the account.
Tip:
Activation links that use a random key look like this:
http://www.yourdomain.com?activate.php?kt_login_id=3&kt_login_random=3f6de6ea7e1a5897bec5fe997923412c
Because of the random key that is attached at the end of this URL,
this address is virtually impossible to guess. This means other users
will not be able to activate your account just by entering the URL address
in the browser or use your e-mail address to create accounts. When the
user clicks on such a link, aside the account being activated, an automatic
login will be performed as well.
- When done with the database settings, move on to
the Session tab.
The Session tab
This is where you can configure what will be stored in session variables
for each user that logs in successfully:

To configure this options tab, follow the steps below:
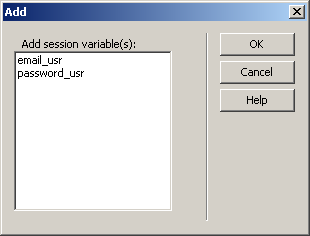
- In
the Session variables grid, all session variables
and their associated table columns are displayed. You can add or remove
an entry by using the +/- buttons. You can only add session variables
while there are table columns left unused. The table columns are taken
from the user table selected in the Database
tab.
- You can edit the properties of the session variables
that you added to the grid. Select the variable in the grid, then use
the Session variable name and Table
column text-boxes to set its corresponding options.
Note: these two text boxes are disabled for the session variables
that were automatically generated (according to your selection in the
Validate against radio buttons of the Options tab).
- Click on the User levels
tab to continue configuring the .
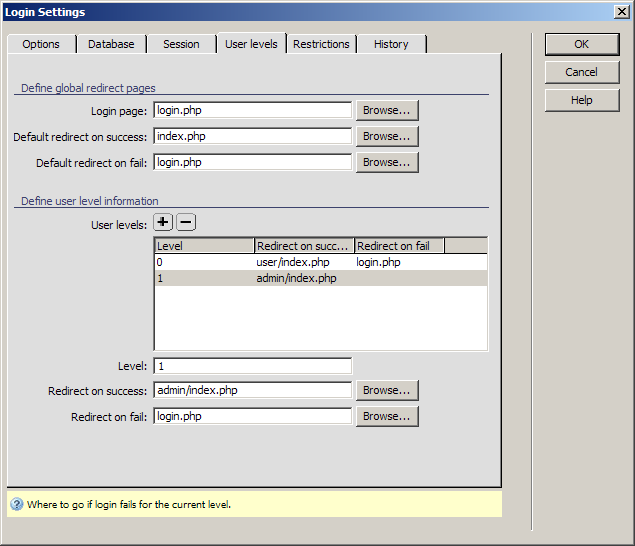
The User Levels tab
In the User Levels tab, you can select global redirect
options, as well as redirect options for each user level. Also, this is
the place where you can define the user levels to compare against the
ones stored in the database:
To configure this user interface, follow the next steps:
- In the Login page text-box
enter the page that allows the user to login.
- In the Default redirect on
success text-box enter the page that will be opened if the login
operation succeeded.
- In the Default redirect on
fail text-box enter the page to be opened when a user tries to
access a page for which he/she does not have the needed credentials.
- In the User levels grid,
all defined user levels and their associated redirect pages are displayed.
You can add or remove user levels through the buttons on top of the grid. To edit options for any of the user
levels, select it from the grid, and set its options in the following
text-boxes:
· In the
Level text box enter a number (e.g. 0, 1,
2 etc) that would indicate the access level.
· In the
Redirect on success text-box, enter the page
to open if the login operation for the selected user level is successful.
You can use the button to locate
the file.
· In the
Redirect on fail text-box, enter the page
to open if the login operation fails for the selected user level. You
can use the button to locate the
file.
- Click when you are
done configuring the dialog box.
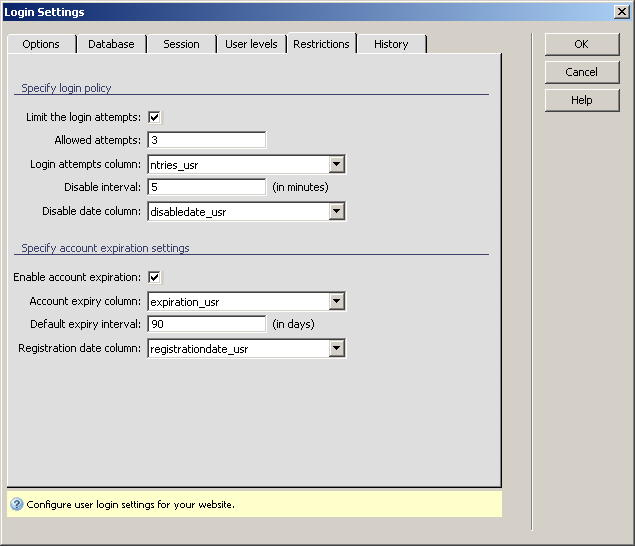
The Restrictions tab
In the Restrictions tab you can set options that block users, enable expiration
dates for accounts and enforce a maximum number of login tries. This extra
tab of the user interface is available only in .
To
configure the user interface follow the next steps:
- If you want to allow users only a limited number
of login attempts, tick the Limit the login attempts
checkbox.
- In the Alowed
attempts text field enter the number of login attempts that an
user is allowed to make.
- In the Login attempts column
drop-down menu select the table column used to store the number
of login attempts. The field must be set to store integer numbers and
have enough length to store the maximum number of tries.
- In the Disable interval
text field enter the duration - in hours - for which the user that has
used up the maximum number of attempts is not allowed to login. The minimum
is 1 hour.
- In the Disable date column
drop-down menu select the table column used to store the date when the
user is allowed to login again.
- If the account has to expire after an interval, and
the user will no longer be allowed access through the login (e.g. for
a limited time trial, or demo) tick the Enable account
expiration checkbox. This will enable the second set of settings.
- In the Account expiration column
enter the table column where the duration of the account availability
is stored.
- In the Default expiration interval
text field enter the interval, in days, for which the account is active.
After this period passes, the user is no longer allowed access.
- In the Registration date field
drop-down menu select the table field into which the date and time when
the user has registered is saved.
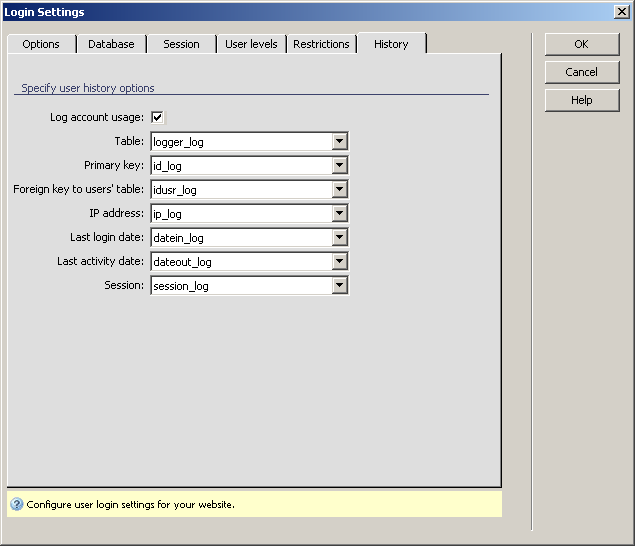
The History tab
The
History tab allows you to set options on what user action to log, and
into which database. You can configure options to allow you to build statistics
reports for user activity. This set of options is available only if you
have .
To
configure the user interface, follow the steps below:
- First decide whether you want to use the logging
capabilities provided by .
To save your choice, tick the Use logger feature checkbox. This will enable
adding transparent triggers to the login and logout actions which save
information to the database.
- In the Table drop-down
menu select the database table that you want to save the logging information
into. The table must be related to the user table through a column.
- In the Primary key drop-down
menu select the log table's primary key column.
- In the Foreign key to users'
table drop-down menu select the table column that will store the
relation between the user information table and the log table.
- In the IP address drop-down
menu select the table column into which to save the user's IP address.
The column must allow at least 30 characters.
- In the Last login date
drop-down menu select the table column into which to save the date and
time when the user last logged in.
- In the Last activity date
drop-down menu select the table column to store the date and time when
the user last left the site - through a logout.
- In the Session drop-down
menu select the table column to store the length of the user session.