![]()
|
|
![]()
|
|
This trigger allows the site developer to send an e-mail message to multiple recipients when a form is submitted. By recipients, we understand the contacts (people, departments, companies) the site developer has, contacts whose e-mail addresses are stored in the database. The table column that contains the e-mail addresses will have to be included in a recordset before applying this trigger (thus the name of the trigger).
Note: The Send E-mail To Recipients From Recordset server behavior should not be used with large numbers of recipients, because you will not have perfect control over the mailing queue. Depending on your mail server configuration, the execution time might expire, if your mailing queue is very long. For a professional newsletter solution, we recommend MX Newsletter, which gives you perfect control over the mailing queues and has an optimized e-mail sending process.
Send E-mail To Recipients From Recordset is an AFTER trigger, and it requires the existence of an insert/update/delete/custom transaction and of a previously created recordset.
This trigger is accessible from the Application panel, Server Behaviors -> + -> MX Kollection -> Send E-mail -> Send E-mail To Recipients From Recordset.
The user interface is divided into three (or four) tabs, depending on the MX Kollection version that you have installed:
The Main tab - set the basic e-mail options here: sender, receiver, message and subject.
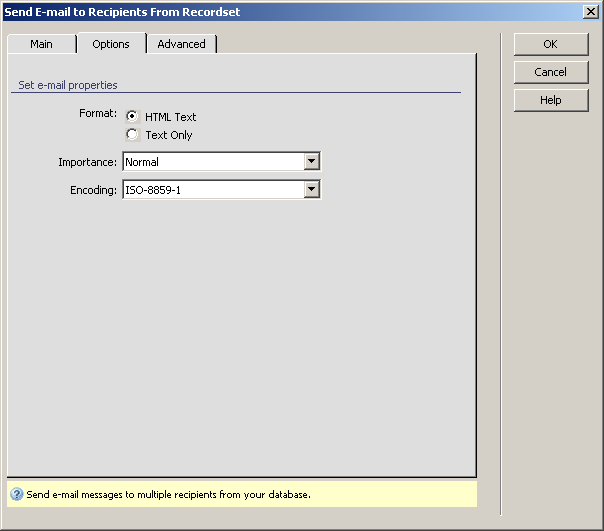
The Options tab - set more advanced e-mail options, like format, carbon copies and importance.
The Attachments tab - available only in MX Kollection 3 Professional, allows defining rules for attaching files to a message.
The Advanced tab - define trigger importance and starting time.
You can learn how to configure each of the interface tab in the sections below.
Allows defining the basic e-mail options.

To set the dialog box options for the first tab, follow the next steps:
Define the e-mail format, carbon and blind carbon copies and importance.
For instructions on completing this step, see the Options tab.
This tab of the user interface is only available in the MX Kollection 3 Professional version and allows the user to select files that will be sent with the e-mail message as attachments.
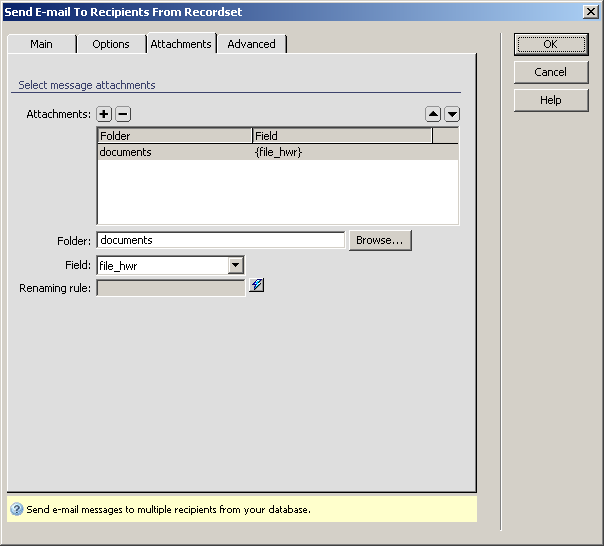
Configure the user interface options as shown below:
The Attachments grid displays all of the attachment rules defined for the current server behavior. You can add and remove attachments by using the Plus (+) and Minus (-) buttons on top of the grid. Fill in each rule's options by selecting it in the grid and filling in the fields below.
In the Folder field enter the relative path to the folder storing the file(s) you wish to send. You can use the Browse button to select the folder from the site structure. The path to the folder will be displayed relative to the current document.
In the Field drop-down menu select which of the transaction fields stores the file name. If not using a recordset, or using a custom naming, select the None: Rename rule option.
In the Renaming rule text field enter the name of the file to attach. This field is enabled only when using the Rename rule option, and allows you to enter static and dynamic data which will compose the name of the file. You can either enter InterAKT Mark-up directly or use the InterAKT Dynamic Data icon to visually select it.
On the last and optional tab of the user interface, configure the trigger properties: transaction to attach to, priority and when to execute it.

For instructions on completing this step, see the
Advanced tab.