![]()
|
|
![]()
|
|
In this tutorial topic you will create a NeXTensio list that will allow displaying articles already existing in the database. Aside the actual list, elements that allow manipulating the records are added as well: add, update or delete buttons, either for individual or multiple records.
To create the list, follow the next steps:
Open the index file in Dreamweaver.
If you haven't already configured a database connection, do so now. In order to continue beyond this step you must have a working database connection.
Apply the NeXTensio List Wizard. Its icon can be found on the MX Kollection tab of the Insert bar.
Configure each step of the wizard as follows:
In the first step select the database connection
created earlier, and for the table to use select the only one: article_art.
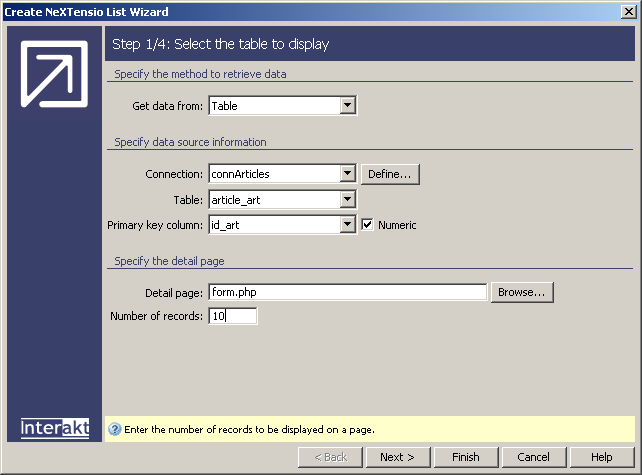
For steps 2 and 3 there are no changes that must be made. All of the table columns will be displayed, except the primary key which is removed automatically from the list. They will all use a text field as filter element.
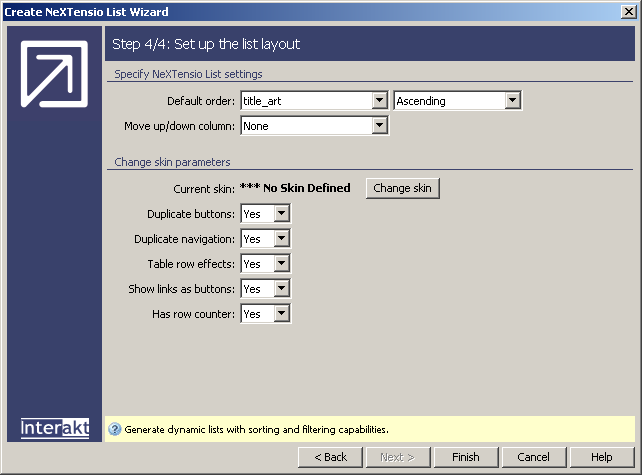
In the last step, configure the general list
properties: the column to order elements by, whether to duplicate buttons,
and which skin to use:
Once all wizard steps are done, you can click the Finish button to close it and add all the related code into the page. The wizard will add the HTML code used to display the list elements and the server behaviors that implement the logic.
As you might have already noticed, the creation and update dates were not used in any particular way in the list. They are just displayed, in order to get a better view of the result. The page that takes actual use of the two cases and provides a way to use each one of them at the intended time is the one containing the NeXTensio Form. This page will be created in the next step.