![]()
|
|
![]()
|
|
In this section you will improve the image gallery in order to group your images into albums. This way, it will be easier to find images that belong to a certain event, as they all will be in the same album. You will have to modify several files: the menu, the upload and the display. Also, each Show thumbnail server behavior will have to be modified, as you will store images belonging to a certain album into its own folder.
First, create the menu that will allow choosing the album to view:
Open the menu.php page in Dreamweaver.
Create a recordset
with all the albums (similar
to the one created in the List images and show thumbnails
page).

Use a dynamic table to create a navigation menu with all the albums from the recordset. This step is similar to the one in the List images and show thumbnails page.
Now you will link each menu entry to the album.php page and add an URL Parameter, id_alb
with the id_alb recordset value. Add an extra column to the dynamic
table by selecting the table and incrementing the Cols
field in the Properties panel.

Arrange the dynamic table to look something like this:

Right click on the view album text, and select the Make
Link option. In the interface, add the id_alb
parameter, and link to the album page.
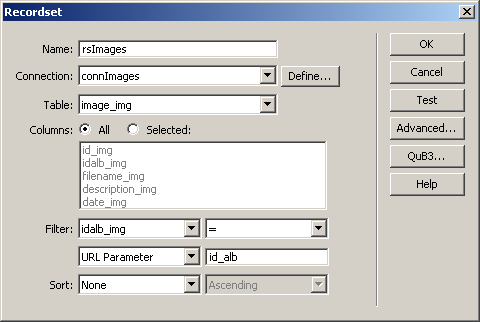
Open the album page. You will create the page
in a similar
way to the thumb_view page by creating a recordset
and adding a dynamic table. Add a recordset to grab records from the image_img table, and filter it using the id_alb
URL parameter. This way, only images in the selected album are displayed.
Now use a dynamic table from the Application tab of the Insert bar to list the results from the recordset above.
Next you have to modify the image upload page:
Open the \admin\upload_img page.
Add a recordset with all the albums from the album_alb table.
Next, you're going to add a drop down menu to
the image upload form. The menu will contain all the album names, allowing
you to specify which album the image will be uploaded to.
· Add a new
row to the form table, above the file field that allows browsing for an
image:

· In the
header column, enter the "Album:"
text.

· In the
second column of the newly inserted row place a List/Menu
form element, from the Forms tab of the
Insert panel, by pressing its corresponding
button.

· After you've
inserted the List/Menu form element, you
can determine what values it will display by using the Property
Inspector. Since the drop-down menu will use album titles as they
are stored in the database
table, hit the Dynamic button.

· In the
user interface that opens, you can add static options, that will be displayed
regardless of what is in the table, and also options for the truly dynamic data:
the recordset to retrieve data from, the Values
column and the Labels column. Configure the
dialog box as you can see below, based on the recordset created on the
first step.

Now the form element that allows choosing an album
is displayed in the page, but when the actual insert transaction
is executed, it is completely ignored. That is because the field was not
associated to a database column when the insert transaction was added
to the page. To add it now, you have to edit the Insert
Transaction server
behavior
by double-clicking its name in the Server Behaviors
tab.
![]()
When the dialog box opens, switch to the Fields tab. Press the Plus
(+) button on top of the Fields
grid, and in the window that opens, select the idalb_img
field from the list. Click OK to close this
window and return to the Insert Record Transaction
interface. In the Fields grid, click on the
newly added field.
Using the interface controls below the Fields
grid, proceed with the following settings:
· In the
Submit as drop-down menu select Numeric.
· In the
Form field drop-down menu select form1.select.
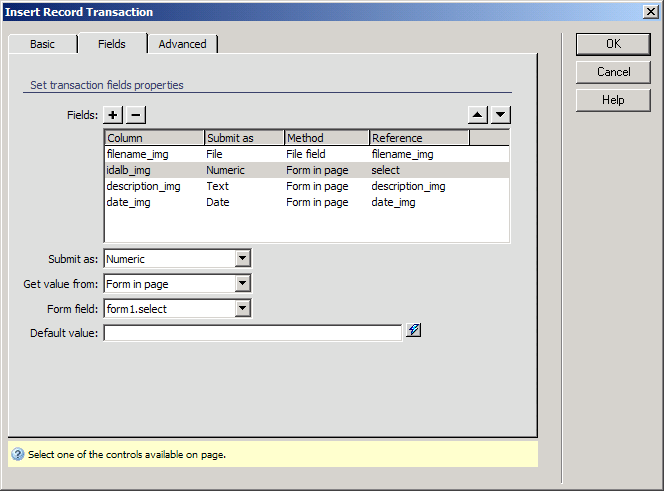
Click OK to close the dialog box.
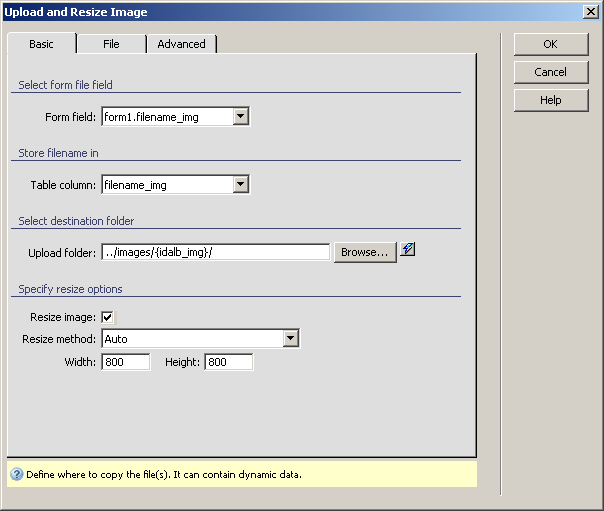
You also need to modify the generated server behavior
for uploading the image by specifying the dynamic upload folder. Open
the server behavior by double-clicking its name in the Server
Behaviors tab and add a dynamic value next to the Upload
folder name. To add the album ID to the path, click the InterAKT
Dynamic Data icon and select the transaction field idalb_img.
In the last step, you modified where uploaded
images will be stored. Therefore, the last thing to fix is the Show
thumbnail server behavior. Actually you need to modify every Show thumbnail server behavior used in the site.
This is because the path to where images are stored has changed. To change
the folder name to a dynamic value, you will do something similar to step
5 above.
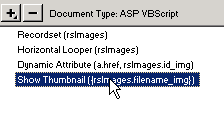
Go to any page that uses a Show thumbnail
behavior - thumb_view, for example. In the server
behaviors list, double-click on the Show Thumbnail
behavior to open its dialog box:
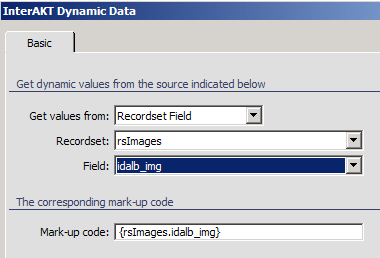
In the interface that appears, select the dynamic data icon (blue icon
bolt) next to the image File folder field:
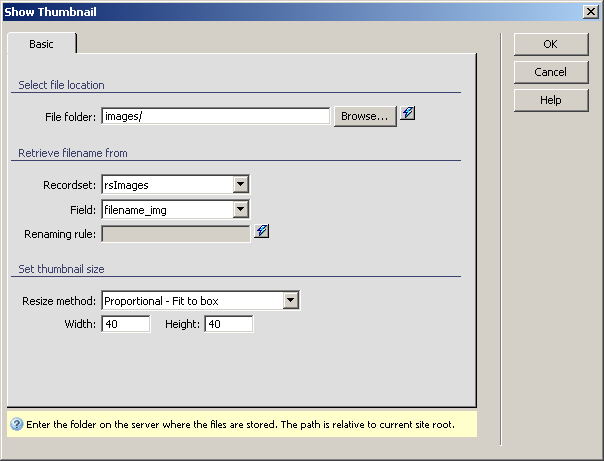
Use the idalb_img field from the rsImages
recordset.
Now the Show thumbnail behavior should be pointing to the correct album
folder:

In the next topic, you will create a more advanced navigation system using MX Includes.