![]()
|
|
![]()
|
|
After applying the Create NeXTensio List Wizard, you can alter the properties of the NeXTensio list fields by using the Manage NeXTensio List Wizard. It is accessible from two locations:
Important: Before applying this command or the server behavior, make sure that you click on the Server Behaviors tab inside the Application panel in order to display the list of existing Server Behaviors on page. This is mandatory, and if you skip this step you will not be able to use the wizard.
This command has three steps and it can be applied any time you want to make changes in a NeXTensio list. These changes regard the three operations: insert, update and delete that can be performed on the NeXTensio list fields. So you can add or remove fields from the list, or you can update the existing ones (header, char width).
The first step of the wizard informs you of the list name:

Note: Since there can only be one NeXTensio list in the page, the wizard automatically opens with the second step. If you want to know the list name, you can hit the < Back button in that second step and check out the list name in the first step.
To set the dialog box options for the second step of the wizard, follow
the instructions below:
In the List columns
grid, there are enumerated the current table columns that appear in the
list. You can add or remove elements by clicking on the Plus
(+) and Minus (-) buttons on top
of the grid. Also, you can change the order columns are displayed in,
by pressing the Up (^) and Down
(v) buttons.
Note: If in the second
step of the Create NeXTensio List Wizard
you removed some table columns and now you want to add them to the list,
you will notice that they are not available in the Add
window. To make them available, you should first edit the list recordset
(double-click it in the Server Behaviors
tab) and add the wanted table columns. Do this by either using the Select button in the window that opens or the
QuB3 button (Query
Builder).
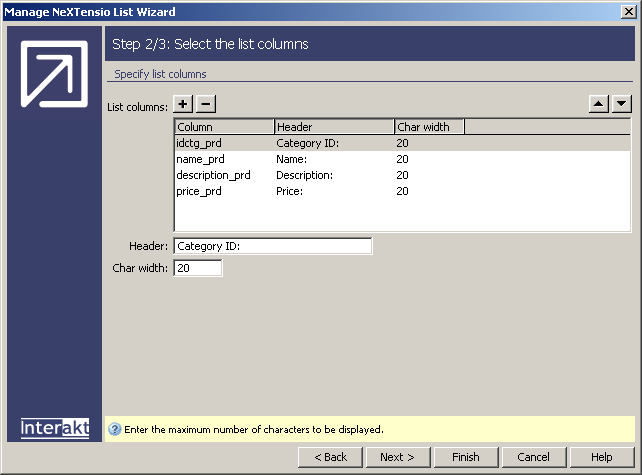
For each column there are some properties that can be modified. To access them, select a list column from the grid in order to modify its properties. The available properties are detailed below.
In the Header text box you can modify the list column title (header).
In the Char width text box you can modify the maximum number of characters accepted by the current list column.
Click Next to continue with configuring the wizard.
To set the dialog box options for the third step of the wizard, follow
the instructions below:

The Use filter drop-down menu is read-only, reminding you if you chose to use filters or not in the Create NeXTensio List Wizard.
In the List columns grid, there are enumerated the table columns that appear in the list. You can set filter properties for each one of them.
If you chose to set filters for the list columns, in the Display as drop-down menu select one of the four possibilities: Text field, Menu, Checkbox, None. The latter one assures that no filter is displayed corresponding to the current column. Read more about these options here.
In the Field type drop-down menu select one of the available options. It shows the way filter form fields are submitted. The available values depend on the element chosen in the Display as field.
Depending on the Display as option, some more buttons may become available. For the menu option, two new buttons, Menu properties and Add recordset are available, allowing you to create a new recordset, and to change the menu items properties.
Click Finish when you are done configuring the wizard.