![]()
|
|
![]()
|
|
The Show Thumbnail server behavior allows you to display dynamic thumbnail images in your site pages. Before applying it, a recordset must be created in your Dreamweaver page. This recordset should contain the image/thumbnail names in one of its fields.
This server behavior is accessible from the Application panel, Server Behaviors -> + -> MX Kollection -> File Upload -> Show Thumbnail.
No image thumbnail is actually created until the page containing a Show Thumbnail server behavior is requested in the browser for the first time. When a thumbnail is created on the server, it is saved in a folder called thumbnails, created inside the image upload folder (either statically or dynamically). In the example below, the image upload folder is called images.
The name of the thumbnail is generated automatically. If the original image is called filename.ext, the corresponding thumbnail will be called filename_WxH.ext, W representing the width and H representing the height of the thumbnail.
Depending on the version of MX Kollection 3, the user interface can contain one tab or more. The user interface tabs are:
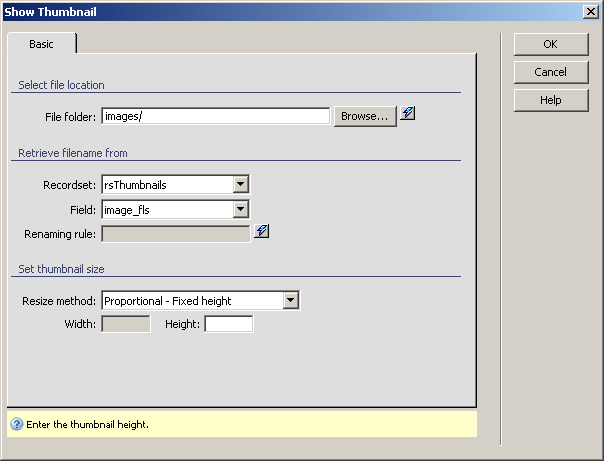
The Basic tab - available in all versions. It allows defining basic thumbnails options, like the location, recordset field and size.
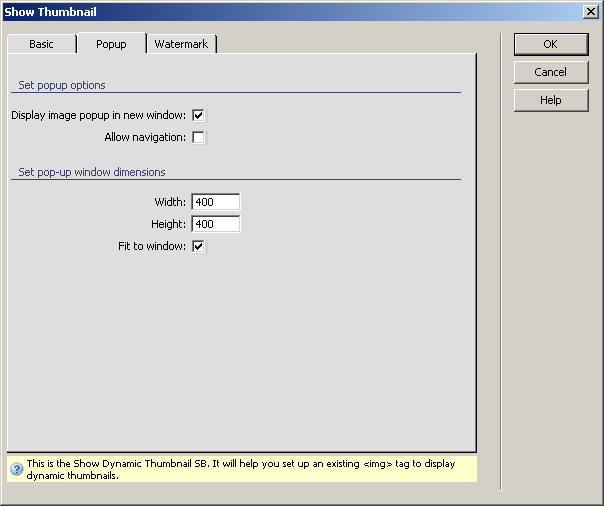
The Popup tab - available only in MX Kollection 3 Professional, allows defining options for previewing one or more related thumbnails in a pop-up window.
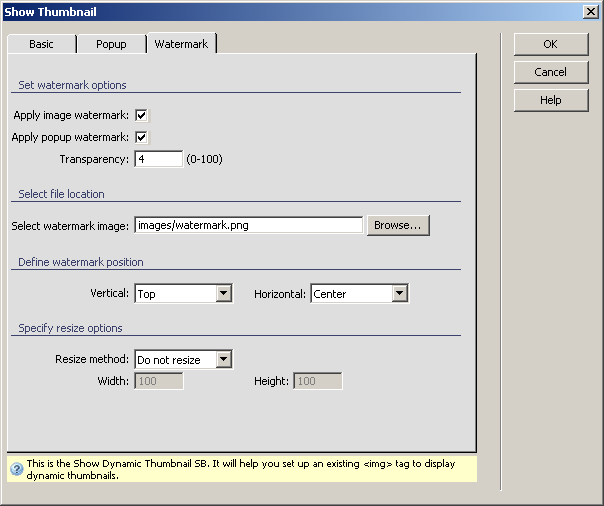
The Watermark tab - available only in MX Kollection 3 Professional. With the options on this tab you can select a watermark image to apply over the thumbnail. This ensures that no other party can use your images.
Directions about how to configure the options on this user interface
tab are given below:
To set the dialog box options, follow the next steps:
This user interface tab is only available in MX Kollection 3 Professional and allows defining popup viewing options: whether to display in another window and whether to use navigation. To set the options on this user interface tab, follow these instructions:
Tick the Display image popup in new windows to enable the use of a pop-up window to display the image.
Tick the Allow navigation checkbox if you want to add a navigation bar in the pop-up window to browse through the images.
In the Width text field enter the width in pixels for the pop-up window with the image preview.
In the Height text field enter the height in pixels for the pop-up window with the image preview.
Tick the Fit to window
checkbox in order to force the image displayed in the pop-up to have the
same size as the window.
This user interface tab is only available in MX Kollection 3 Professional and allows applying a watermark on the thumbnail to be displayed. To set the options on this user interface tab, follow these instructions:
Tick the Apply Image Watermark checkbox to enable adding a watermark over the thumbnail that is created and displayed.
Tick the Apply popup Watermark checkbox to enable adding a watermark over the thumbnail that is displayed in a popup window. This checkbox is enabled only if you have decided to display thumbnails in a pop-up.
In the Transparency text field enter a value between 0 and 100 which will be the value of the watermark transparency. The higher the value, the more opaque the watermark will be.
In the Select Watermark Image file field click the Browse button to select a file from the local site structure.
In the Vertical drop-down menu select where to position the watermark image over the thumbnail on the vertical axis. You can choose between top, center and bottom.
In the Horizontal drop-down menu select where to position the watermark image over the thumbnail on the horizontal axis. You can choose between left, center and right.
In the Resize method drop-down you can decide whether to modify the watermark to better fit the image. Available options are:
Do not resize - the watermark stays at the initial size and is applied as such over the image, in the desired position
Stretch - the watermark is resized to the thumbnail to be applied on size. The positioning does not matter any longer.
Resize - specify a fixed width and height to resize the watermark to.
In the Width and
Height fields which are enabled if you select
the resize option enter the value in pixels for the watermark image.
After applying this server behavior, a translator will be shown in your
Dreamweaver page:
![]()