![]()
![]()
In this tutorial topic you will build the page that displays in the administration area the list of articles, with action buttons. To quickly build the list you will use NeXTensio. The generated list has some useful features, like filters, links, and buttons for the various actions (add, edit, and delete). After creating the basic list, you will enhance it to allow actions based on user level and article status:
The add new button will be visible for authors only.
The delete option will be visible for the webmaster only.
The edit button will be visible for both authors and editors, based on the article status - if the article is a draft, than the author will be able to edit; if it is in review, only the reviewer.
To create the basic NeXTensio list for articles, follow the next steps:
Open the admin/list page in Dreamweaver.
Go to the MX Kollection tab of the Insert bar and click on the Create NeXTensio List Wizard icon. The wizard is divided into four (4) steps with various options.
In the first step of the wizard define general
options - the table to list, the form page:

In the Get data from drop-down menu select Table.
In the Connection drop-down menu select connCMS.
In the Table drop-down menu select article_art.
For the Detail page click Browse and select the form page in the same folder.
In the Number of records text box enter the number of rows to display per page: 10.
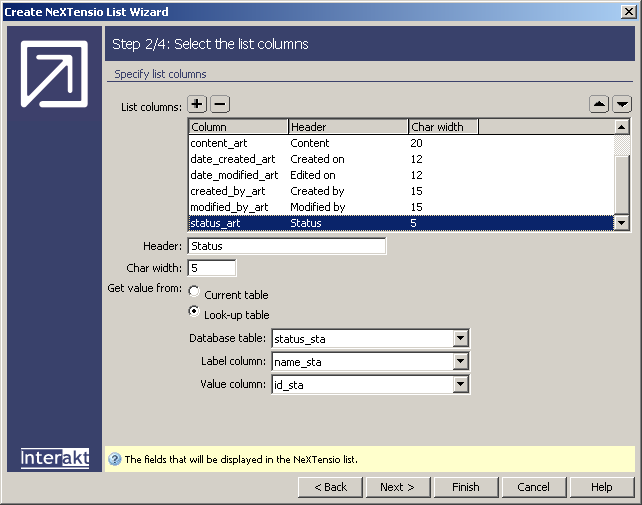
In the second step of the wizard define which
table columns to display, and with what values. To change the properties
for a list column, select it in the grid and use the controls below the
grid to change its properties. Configure each column as follows:
For the idtop_art column:
In the Header text box enter Topic.
In the Char width text box enter 15.
In the Get value from radio group select the Look-up table radio button.
In the Database table drop-down menu select the topic_top table.
In the Label column drop-down menu select the name_top table column.
In the Value column drop-down menu select the id_top table column.
For the date_created_art column:
In the Header text box enter Created on.
In the Char width text box enter 12.
For the date_modified_art column:
In the Header text box enter Edited on.
In the Char width text box enter 12.
For the created_by_art column:
In the Header text box enter Created by.
In the Char width text box enter 15.
In the Get value from radio group select the Look-up table radio button.
In the Database table drop-down menu select the user_usr table.
In the Label column drop-down menu select the email_usr table column.
In the Value column drop-down menu select the id_usr table column.
For the modified_by_art column:
In the Header text box enter Edited by.
In the Char width text box enter 15.
In the Get value from radio group select the Look-up table radio button.
In the Database table drop-down menu select the user_usr table.
In the Label column drop-down menu select the email_usr table column.
In the Value column drop-down menu select the id_usr table column.
Remove the assigned_to_art column from the list. Select it and click the Minus (-) button.
For the status_art column:
In the Header text box enter Status.
In the Char width text box enter 5.
In the Get value from radio group select the Look-up table radio button.
In the Database table drop-down menu select the status_sta table.
In the Label column drop-down menu select the name_sta table column.
In the Value column drop-down menu select the id_sta table column.
When you are done setting up the options, click Next to move on to the next step.
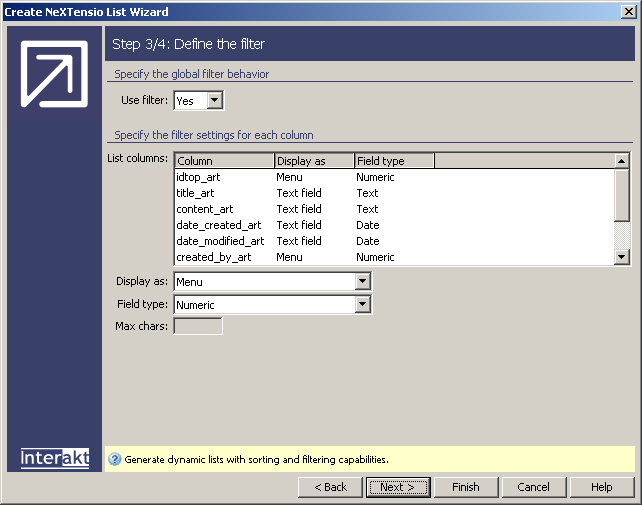
In the third step define what form element to
use for each column filter. All the columns that use a look-up table to
get the value are automatically configured to use a drop-down menu as
the filter element. The menu is dynamic, based on the table for each field.
Check if all options are correct, and move on to the last step:
In the last step of the wizard you can define
list specific options:
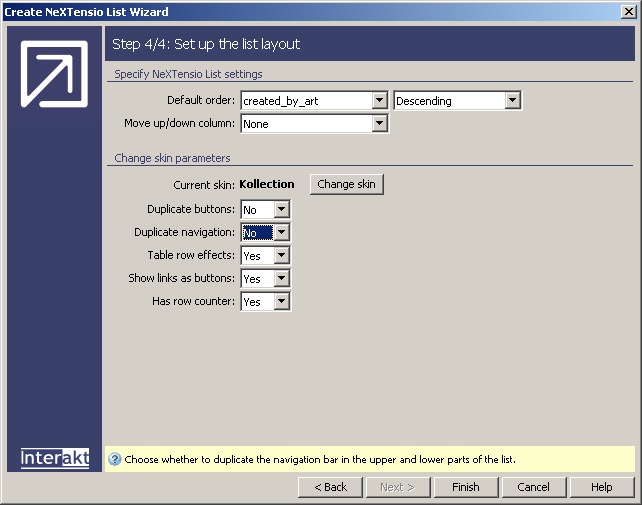
In the Default order drop-down menu select the created_by_art table column. For the method select Descending. This means that the list will be sorted anti-alphabetically.
In the Duplicate buttons drop-down menu select No.
In the Duplicate navigation drop-down menu select No as well.
Click Finish to close the wizard and apply the changes.
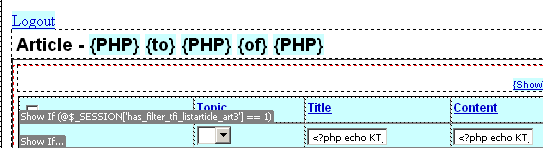
The wizard adds HTML code for the list, as well as application logic
- recordsets that retrieve various information and server behaviors. If
you try to preview the list in a browser, after logging in with one of
the accounts, you can see all the action buttons - add
new, edit and delete:

You must also allow users logout from the administration section. To do so, you will add a link that will reset the session variables and redirect the user to the main site page:
Open the admin/list page in Dreamweaver if needed.
Place the cursor on top of the page - before the generated list layout, and press Enter/Return to create a new paragraph. Then return to the first page line (press the up arrow).
Go to the Server Behaviors
tab > Plus (+) >MX Kollection > User Login and select
the Logout User entry. Configure the user interface
as shown below:
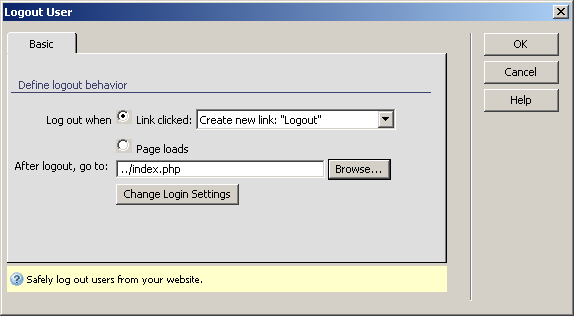
In the Log out when radio group select the first radio-button: Link clicked.
In the After logout, go to text box click the Browse button and select the index page in the site root.
Click OK to apply the server behavior.
A new link will be created in page. If you click on it after logging in, you will be redirected to the main page.
Next you will modify the list so that action buttons will be displayed only when needed: