![]()
![]()
In this topic you will learn how to implement the article assignment and approval process. This is done with two additional buttons that will be displayed next to each list row:
An Assign for review button that is visible for authors only, and which will point to a page where one of the available editors can be selected from a drop-down menu.
An Approve button that is visible for editors only, and that will start an automatic update - transparent to the user -to set the status and assign it to the webmaster.
Implementing this process has two parts:
To create the two buttons, follow the next steps:
Open the admin/list page in Dreamweaver.
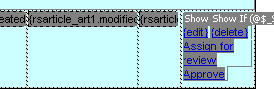
Place the mouse cursor after the delete
link, and type Assign for review Approve.
Make sure you type outside the existing conditional region (select the
conditional region and then press the Left
Arrow key):
Next turn the first text into a link to the assignment page:
Select the link text - Assign for review.
Click the folder icon next to the Link text box in the Property Inspector.
Select the admin/assign page, then click the Parameters button to enter the URL parameters to pass.
For the URL parameter Name enter id_art. For the Value click the Dynamic Data icon and select the id_art column of the ListRecordset.
Click OK twice to create the link.
In order to have the link look like a button - like the others on page - switch to code view and add the following code to the <a> tag of the new link: class="KT_link".
To create the second link you need to follow the same steps, but for the name use Approve and make it point to the admin/approve page. Also pass it the article ID as URL parameter. Then make is look like a button.
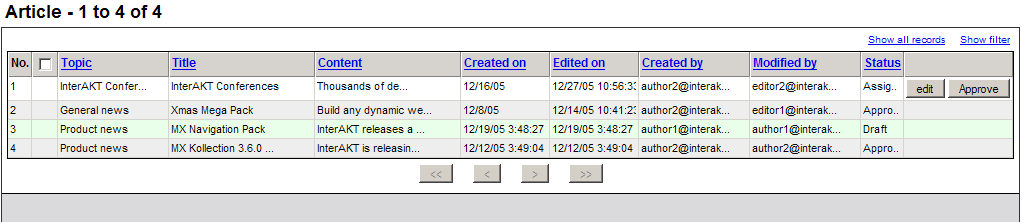
If you preview the page in a browser, the two buttons will be displayed:
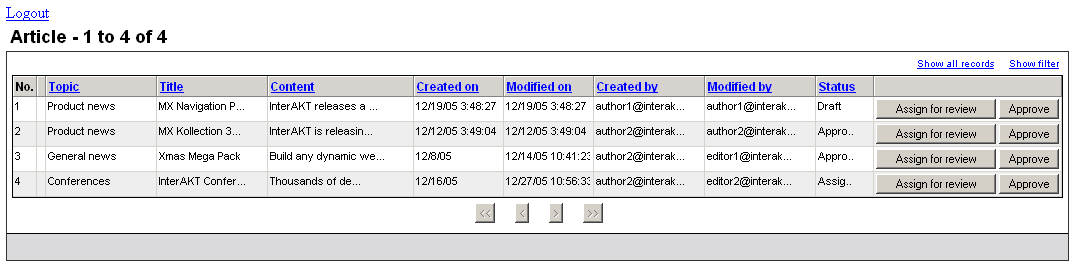
The Assign for review button will be displayed only for authors, and only for the articles they have assigned - which are the same they wrote and set as draft. To hide it from all others:
Select the Assign for review link in Dreamweaver.
Go to the Server Behaviors tab > Plus (+) > MX Kollection > Conditional Regions and select the Show If Conditional Region server behavior.
Configure the user interface fields to add the first condition - the assigned_to_art field must match the session stored ID, similar to the list restrictions.
For the Expression 1 text box click the Dynamic data icon and select the assigned_to_art column of the ListRecordset.
The Condition is equality.
In the Expression 2 text box click the Dynamic data icon and select the kt_login_id session variable.
Next click on the
Advanced tab of the user interface to add a
second condition. Place the cursor in the Expression
textarea, after the existing text and type:
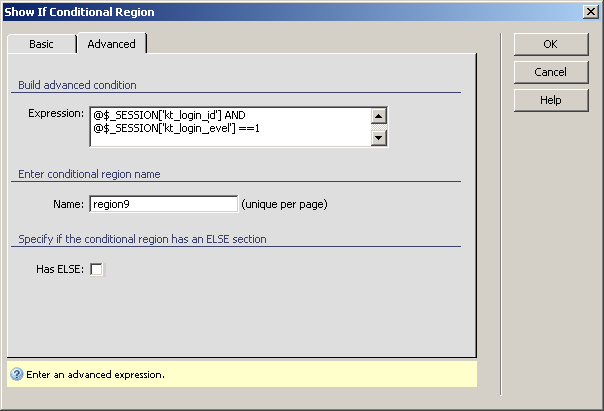
Note: The image above was made using the PHP
sever model.
For PHP:
AND @$_SESSION['kt_login_level'] ==1
For ColdFusion:
AND SESSION.kt_login_level EQ 1
For ASP_VBScript:
AND Session("kt_login_level") = 1
Click OK to close the user interface and apply the changes.
If you preview the page in a browser as an author and you do not have any articles, the buttons will not be displayed.
Repeat the steps above for the Approve button as well. In step 4 replace the value of the access level with 2 - the editor level, instead of 1 - the author level.
Before moving on switch to code view and check that the show if conditional regions have been applied properly - each of the link must have a start show if region and an end shod if region comment in front and after them.
In this section you will create the page that allows an author pick an editor to perform the review. The page is accessed by the author through the article list, by clicking on the Assign for review button. The page receives the article ID as an URL parameter.
To build this page you need:
A recordset that retrieves all the editors.
An update transaction that will change the values in the assigned_to_art and status_art columns.
To create this page, follow the next steps:
Open the admin/assign page in Dreamweaver.
Go to the Bindings tab > Plus (+) > Recordset (Query).
Configure the Recordset
interface as shown below:
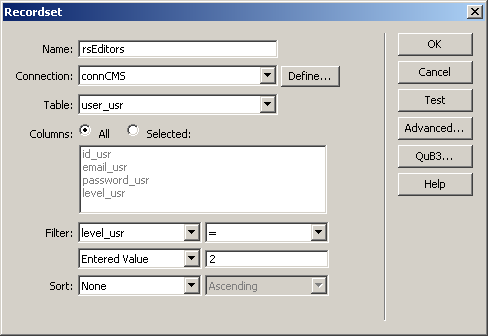
In the Name text box enter the new recordset's name - rsEditors.
In the Connection drop-down select the Dreamweaver database connection created earlier - connCMS.
In the Table drop-down menu select the user_usr table.
In the Filter drop-down menu select the column to check - level_usr. For the method select Entered value and for the reference enter 2 - the editor level.
Click OK to close the user interface and create the recordset.
To add the update operation, go to the MX Kollection tab of the Insert bar and click the Update Record Form Wizard icon. The wizard is divided into three steps.
In the first step of the wizard specify the table
to update information:
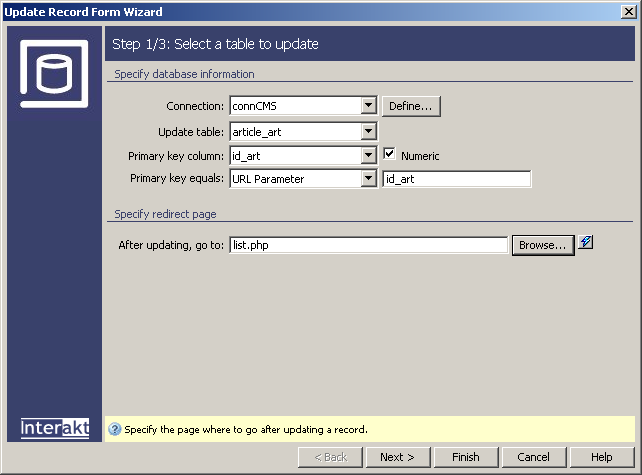
In the Connection drop-down menu select the connCMS database connection.
In the Update table drop-down menu select the article_art table.
In the Primary key equals drop-down menu select URL parameter. For the method enter id_art - the URL parameter that the list passes.
In the After updating, go to text box click the Browse button and select the admin/list page.
In the second step configure the fields to take
part in the update transaction:
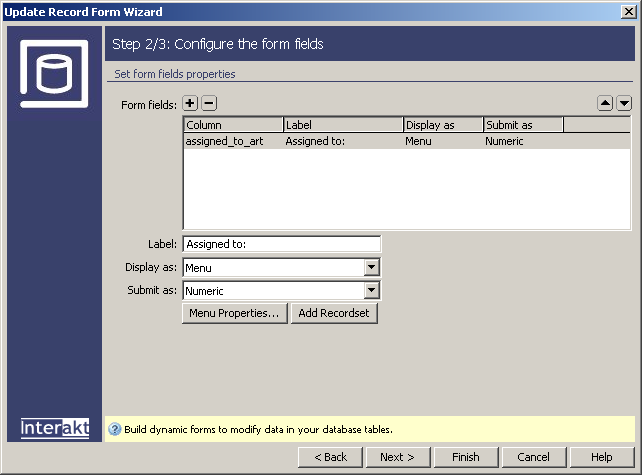
Remove all fields except for the assigned_to_art. Select each of them and click the Minus (-) button on top of the grid.
For the assigned_to_art
field, in the Display as drop-down menu select
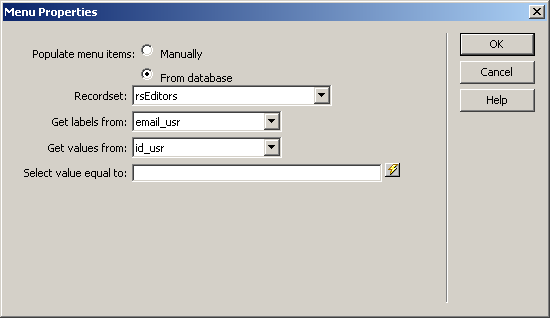
Menu. Next click the Menu
Properties button to set it to use the rsEditors
recordset you've created earlier. Configure the user interface as shown
below:
Click OK to apply the changes.
In the Label text box enter Assigned to.
In the third step of the wizard select the assigned_to_art field and check the Required
option:
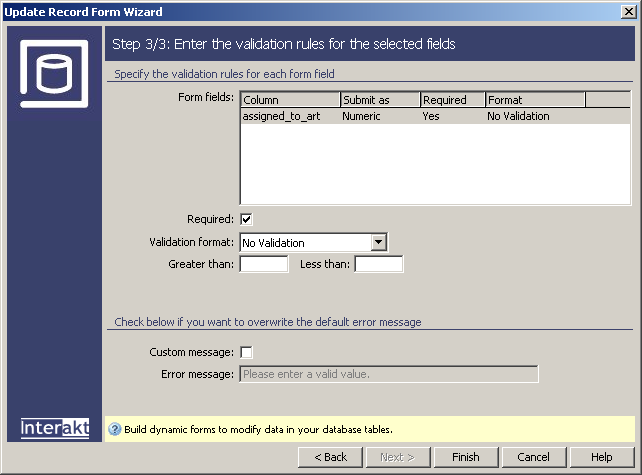
Click Finish when done to close the user interface and create the update form.
You also need to change the article state - from draft to review. Because this is not a field that the user can work on, you have to set it with the Add Transaction Fields server behavior.
Go to the Server Behaviors tab > Plus (+) > MX Kollection > Forms > Advanced and select the Add Transaction Fields entry.
Configure the user interface as shown below:
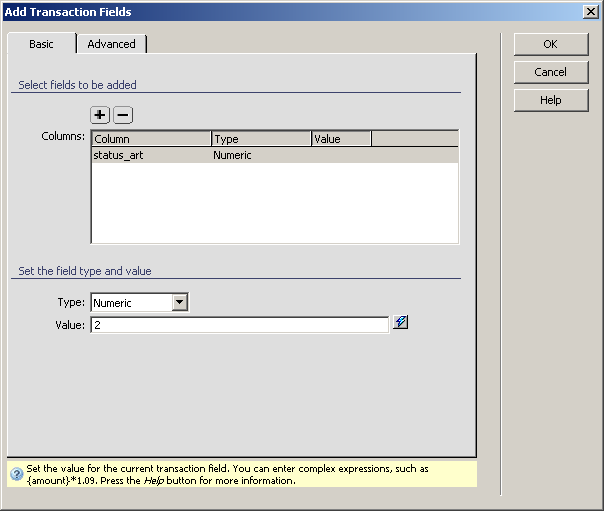
Click on the Plus (+) button on top of the Columns grid to add another field. From the list select the status_art column.
In the Type drop-down menu select Numeric.
In the Value text box enter 2.
Click OK to apply the server behavior.
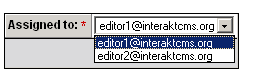
Save the page and upload it on the server. When you click the Assign for review button next to one of your articles,
the page will load and an editor can be selected.
The approve page is accessed by editors who have finished the review and deem the article worthy to be published. What it does is automatically change the status_art column to 3 - approved, and return the user back to the list page.
Open the admin/approve page in Dreamweaver.
Go to the Server Behaviors tab > Plus (+) > MX Kollection > Forms > Advanced and select the Update Record Transaction server behavior. The user interface is divided into three tabs. Thanks to the user interface persistence, most of the fields are already filled in.
On the first tab - Basic
- configure general options:

In the Connection drop-down menu select the connCMS database connection.
In the Update in table drop-down menu select the article_art table.
In the Primary key equals drop-down menu select URL parameter. For the parameter name enter id_art - the URL parameter that the list passes.
In the First check variable drop-down menu select Entered value, and for the reference enter 1. This means that the update will start automatically.
For the After updating, go to text box click the Browse button and select the admin/list page.
On the Fields tab configure
the fields to update:
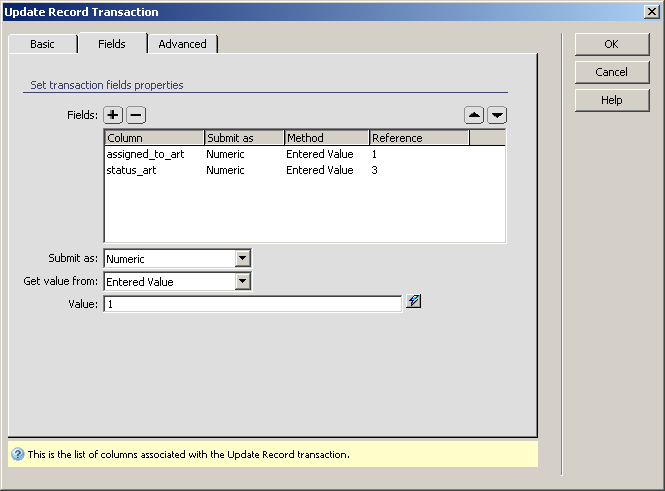
Because of the user interface persistence, the assigned_to_art field is the only one in the list. Click the Plus (+) button and add the status_art column as well. If you have user interface persistence turned off you must remove all fields except the status_art and assigned_to_art.
For both fields, in the Get value from drop-down menu select Entered value.
In the Value text
box enter 1 (the default webmaster ID) for
the assigned_to_art column, and 3 for the
status_art.
Note: If you have another default webmaster, use the correct
ID. To make the page dynamic, you can use a recordset that retrieves the
first encountered webmaster, and uses its ID for the field.
Click OK to apply the update transaction. Save the page.
Now if you login with an editor account and you have an assigned article,
by clicking the Approve button, its state
will change, you won't be able to edit it anymore, and it will also appear
in the site front-end.
This completes the changes you have to make for the list to be fully functional. Next you have to create the form that allows adding, editing and removing articles.