![]()
![]()
In this topic of the tutorial you will create the page that displays details for an article: title, full article content, author etc.
To create this page you must:
In order to retrieve all article details you must retrieve information from several tables:
The topic title from the topic_top table
Article title, content and creation date from the article_art table.
Author's e-mail from the user_usr table.
To visually build this complex recordset you will use MX Query Builder once more:
Open the article_detail page in Dreamweaver.
Go to the Bindings tab > Plus (+) and select the Recordset (Query) option.
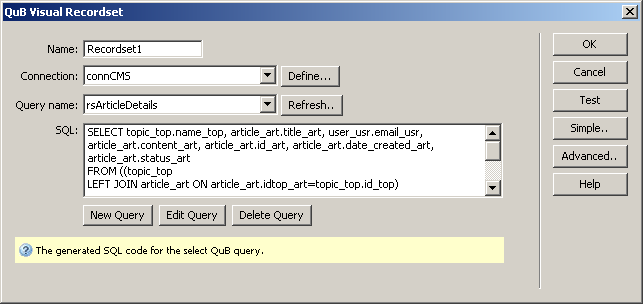
Click the QuB3 button to load the QuB Visual Recordset interface. Configure it as follows:
In the Name text box enter the new recordset name: rsArticleDetails.
In the Connection drop-down menu select the connCMS database connection.
Click New Query to start MX Query Builder.
In the pop-up dialog box enter the same name as for the recordset: rsArticleDetails.
The MX Query Builder interface is web based and will load in an external browser. Its interface is fully presented here.
To create the query, follow the next steps:
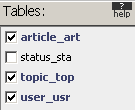
In the Tables section
check the topic_top, article_art
and user_usr tables:
In the main area you have to define the relations
between the three tables. Drag and drop the id_top
column of the topic_top table over the idtop_art column of the article_art
table, then the created_by_art column of
the article_art table over the id_usr
column of the user_usr table. The relations
will be symbolized by some blue lines:
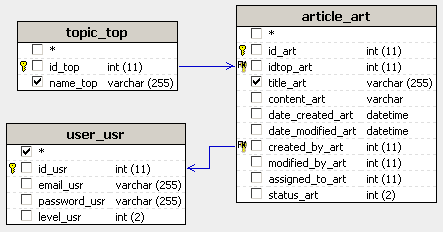
From each table check the columns to retrieve: name_top, email_usr, id_art, title_art, content_art, date_created_art, status_art. The selected columns will be displayed in the Columns area, where you can also define conditions.
You need to define two conditions, similar to the article list recordset: one for the id_art column and one for the status_art column. To define a condition click the ... button next to the Condition text box for the desired column.
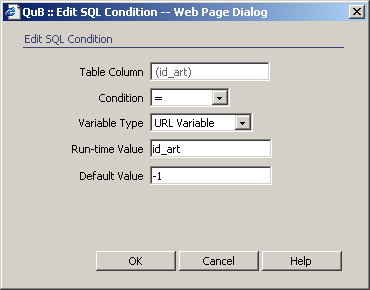
First set the condition for the id_art
column. It must match the id_art URL parameter,
so configure the Condition dialog box like in
the following image:
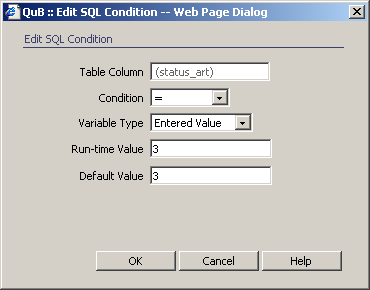
The status_art
column must store the value "3" - the status of approved articles.
Configure the Condition dialog box:
From the Query menu select Save and then Close to return to Dreamweaver.
In Dreamweaver click
the Refresh button to load the created query
in the SQL textarea, then OK
to close the interface and create the recordset:
The recordset and all of the selected columns are displayed in the Bindings tab. Next you will use the recordset fields to create the page.
After retrieving the information from the database tables, you must display it on page:
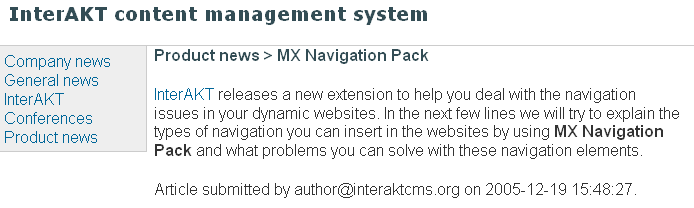
Drag and drop the name_top column from the Bindings tab onto the page. Type ">" (without the quotes) with a trailing and preceding blank space, then drag and drop the title_art column. Select the entire text and from the Format drop-down menu in the Property Inspector select the Heading 3 format.
Create a new paragraph after the article title, and drag and drop the content_art column from the Bindings tab.
On yet another paragraph type: Article submitted by (followed by Space), then drag and drop the email_usr column onto the page. Type on and drag and drop the date_created_art column on the page. This will display the article author and submit date.
Viewed in Dreamweaver,
the page looks like:

This concludes the creation of the article detail page. Save the page and close it.
Before testing the page you must add it to the main page's Server-Side Includes From List:
Open the index page in Dreamweaver.
Double-click the Server-Side Includes From List server behavior in the Server Behaviors tab to edit it.
Click the Plus (+) button to add a new included file:
In the URL parameter value enter article_details.
For the Filename click the Browse button and select the article_detail page in the site root.
In the Page title text box enter Read article.
Click OK to apply the changes.
To test the article_detail page, save the
index and press F12
to preview it in the browser. Select one category with articles, and then
press the Read more link next
to one of the articles:
With this page you have completed building the application front-end. Users can browse topics and read articles. Next you have to create the administration section which allows users to create articles (in rich HTML format), assign them for review, and finally approve them.
In the next section of the tutorial you will do just that, using KTML 4 and NeXTensio lists and forms.