Auto-archive
old articles
The first improvement to add to your site is the possibility to archive
old articles. If you use your site in a more intensive manner, you may
end up having users view articles from months ago, which have no relevance
in the present context. Archiving is a more useful option than deletion,
because you might need the files for future use.
The visible_pag field makes the archiving
implementation very simple. This field determines whether an article will
be displayed or not. You could edit each article and set the field to
0 (not visible), but for a large number of articles this takes a lot of
time. This is why you will create a new administration page, allowing
you to select a date from a calendar. All records that were posted before
that date, are to be set as invisible.
To create this page, follow the next steps:
- In the admin folder, create
a new file, called archive Open it in .
- Since this is an administrative page, you should
apply a server behavior..
- Next, you must insert the field that will allow selecting
a date. To implement both the form elements and the
logic, use the , that
is accessible from the tab
of the .
-
Once the Custom Form Wizard opens, configure it in the following manner:
- In the Connection
drop-down select the database
connection used in your site. If you do not have a connection, create
a new one, by clicking on the button.
- In the When finished, go
to text field, enter the page that will be opened when the operation
finishes: index

- In the second step of the wizard, you must add
a transaction
field that will allow you to enter the date. Click the button of the Form fields grid,
and enter the label: .
Once added, change its submit as property to date. If left as text, it
will provide bad input to the database transaction.
Note: If you are using a database, in the Submit as
drop-down menu, another option will be available: Date
MS Access. Select this option when submitting the date.

- If you have MX Form Validation installed, an
additional step is available in the wizard: the third, providing a way
to validate input. Simply skip this step, as it is not required.
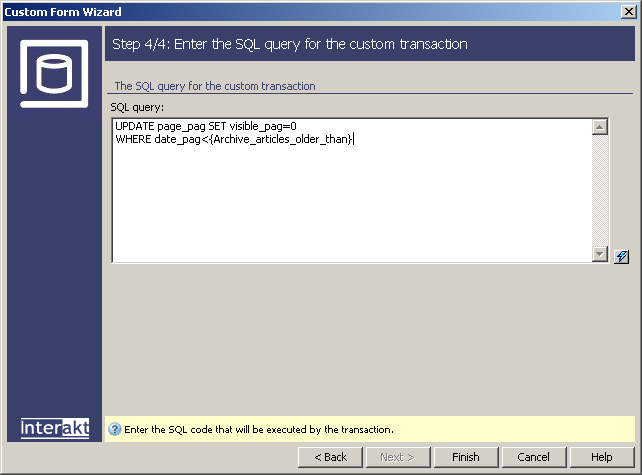
- In the final step of the wizard, you have to
write the SQL query
that will perform the actual operation. It is a simple update query, involving
the field added at the last step as dynamic data:
UPDATE page_pag SET visible_pag=0
WHERE date_pag<{Archive_articles_older_than}
- Just paste the above code in the SQL area. The
dynamic mark-up can be selected by clicking the InterAKT Dynamic Data
icon, and choosing the right transaction field.
- When you click the Finish button, a form will
be added into the page, along with some server behaviors. If you need
to edit the transaction properties, simply double-click the corresponding
server behavior in the Server Behaviors tab of the Application panel.

- By default, the will name the submit button as . Change it to .
- If you preview the page in the browser, after you
login, a standard text-box where you can enter a date is displayed. If
you enter a valid date, it will perform the requested operation and return
you to the admin index.
- The problem with this approach is that you have to
enter the date by hand, and in the correct format. Why not use a calendar,
where you can visually select the date?
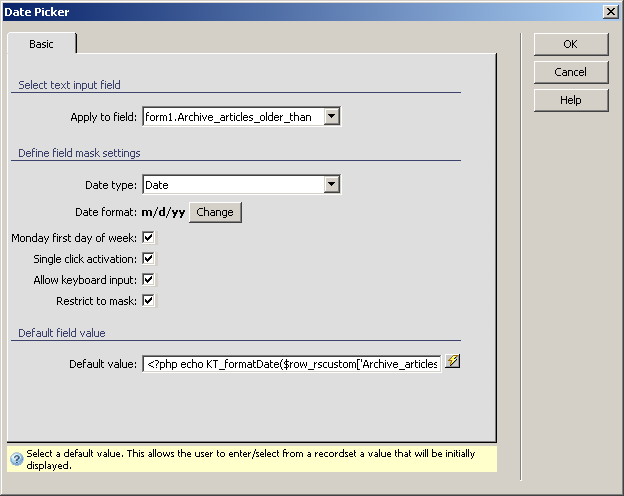
- To
improve the standard text-field, you must have installed. If you do, then simply select the text-field
on page, and apply the DatePicker text field server behaviors, from the
.
- Once the dialog box opens, you can configure some
properties for the calendar, like whether to use single - click or double-click
for activation, and more. Select the options that suits your taste, and
click on to apply it:
- In Dreamweaver, there is little modification to be
seen, unless you look at the code. When you save and preview the page
in the browser, however, a new button is displayed next to the text-field.
When you press it, a calendar will open, allowing you to select the date:

When you click the button, the
SQL query will run, and will update records as necessary. You can verify
this behavior, by opening the
in the administration area, and notice the new values.
The next improvement you'll add to your site, is to replace the text-area
form element used to enter the article content with control, allowing you to
enter rich content visually.