![]()
|
|
![]()
|
|
The Smart Date server behavior allows the web developers to include a smart date text field in their site pages. Before applying it, there must be a text field added in the Dreamweaver page.
This server behavior is accessible from the Application panel, Server Behaviors -> + -> MX Kollection -> Form Controls -> Smart Date.
The user interface has only one tab. Directions about its correct configuration
are given below.
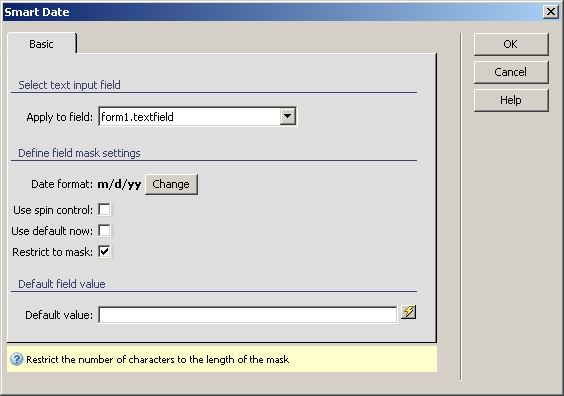
To set the dialog box options, follow the next steps:
In the Apply to field drop-down menu select the text field on which to apply the server behavior.
The Date format used
in your site is displayed in bold text. You can change it by clicking
on the button next to it, Change. For more
details, read Date formats.
Note: If the entered information is to be inserted in your database,
select the date format that is compatible with the table field that stores
the date-type data.