![]()
|
|
![]()
|
|
In this tutorial topic you will create the page that lists the current students found in the database. For each one of them, the name and the e-mail address will be displayed in a NeXTensio list. This way, you can easily add, modify and delete entries.
To build the page, follow the steps below:
Open the index page in Dreamweaver (if not already opened).
Start the Create NeXTensio List Wizard from the MX Kollection tab of the Insert panel.
In the first step of the wizard:

Select the connection previously defined: conn_ManyToMany.
Select the table storing the data to display in the list: student_std.
The column that stores the primary key is automatically detected.
Leave the Detail page and Number of records at their default values.
Click the Next button to move on to the next step.
In the second step of the wizard:
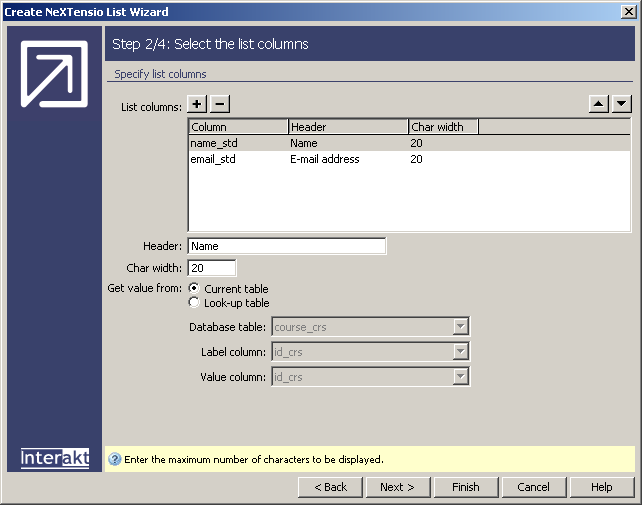
Select the email_std column and rename its Header to E-mail address.
Leave the other settings at their default.
Click the Next button to move on to the next step.
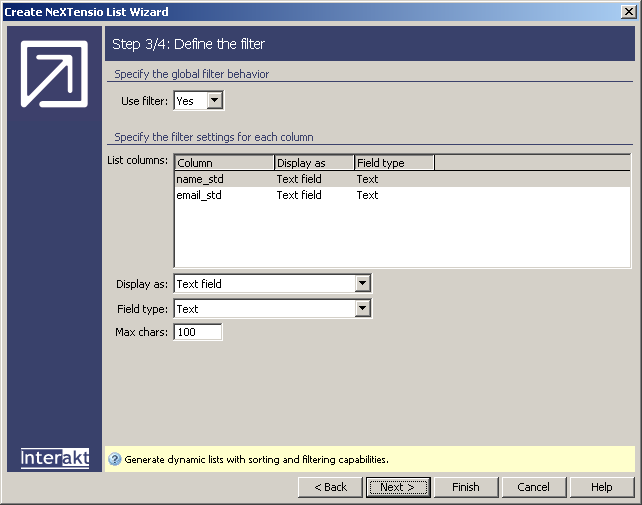
In the third step of the wizard, do not make any
change. By default, the NeXTensio list uses
filters and you can use this capability later on in the application if
you want to. Click the Next button to move
on to the last step of the wizard:
In the fourth and last step of the wizard:
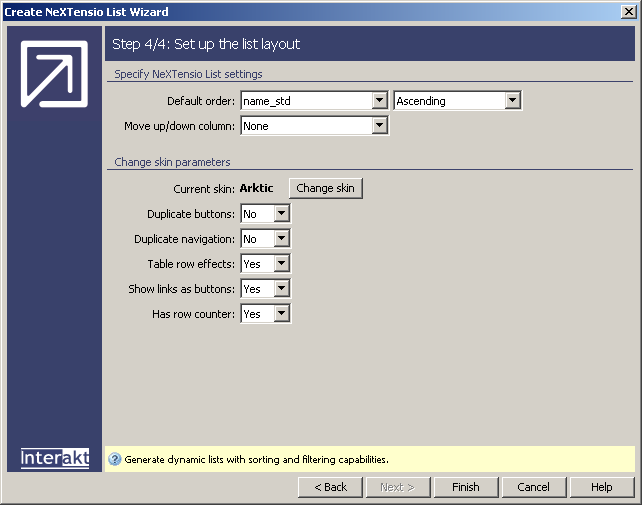
Order the list by the name_std column in the ascending manner.
You are not using a Move up/down column, so leave the None option in that drop-down menu.
Click the Change skin button and let's choose the Arktic skin for this site.
In the Duplicate buttons and Duplicate navigation drop-down menus let's choose the No option this time.
Leave the other controls at their default values.
Click Finish to apply the Create NeXTensio List Wizard.
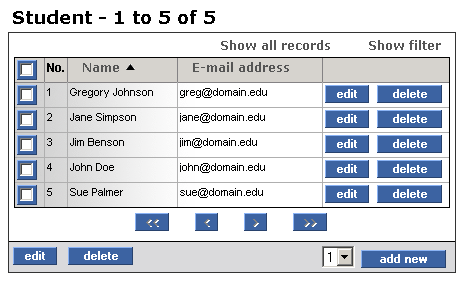
Save the page and upload it to the server. If you want to preview it
in the browser, you will see the students displayed in a NeXTensio
list:
In the next topic you will build the NeXTensio form, that will allow you to add, edit and delete students, taking into account their course preferences.