![]()
|
|
![]()
|
|
In this section of the tutorial you will create the NeXTensio list counter-part: the NeXTensio form. It will allow users add, edit and delete records, by using the NeXTensio list links.
To create the NeXTensio form, follow the next steps:
Open the form page in Dreamweaver.
Click on the Create NeXTensio Form Wizard icon on the MX Kollection tab of the Insert panel. Configure each of the steps as shown below.
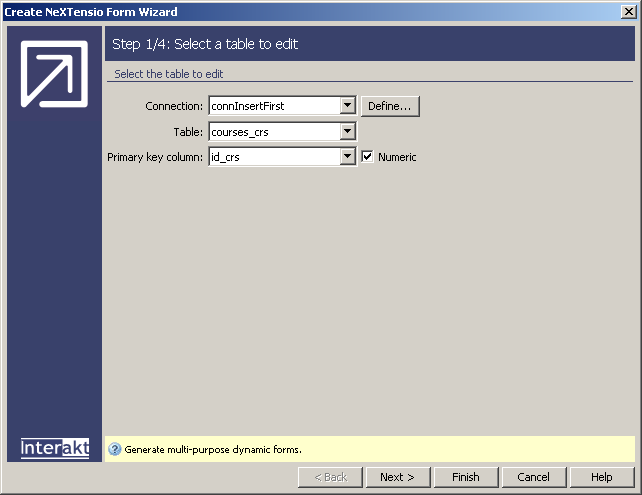
In the first step of the wizard, you must specify table information:
In the Connection drop-down menu, select the database connection created at the beginning of this tutorial (connInsertFirst).
In the Table drop-down menu, select the table to manipulate data from. Select courses_crs (the same as the NeXTensio list).
The Primary key column
is selected automatically (id_crs).
When all options are set, you can move on to the second step of the wizard.
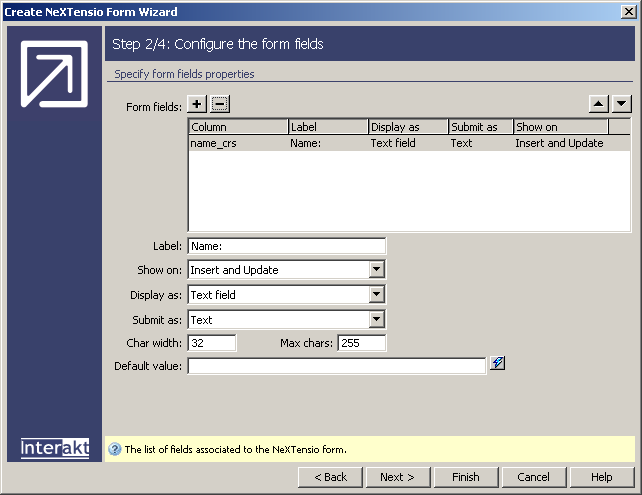
In the second step of the wizard, you can define which table columns will have associated form fields:
In the Form fields grid, select the order_crs column, and click on the Minus (-) button on top of the grid. This will remove the column from the NeXTensio form, as the value for it will be automatically generated by the Auto-increment column trigger.
The name_crs
column is correctly configured by default, so you can move on to the next
step of the wizard.
In the third step of the wizard, you can define validation rules for each field that will appear in the form. Since there is only one field, which accepts any text input, there is no point in using this feature at this moment, so you can directly click on Next to move on to the last step of the wizard.
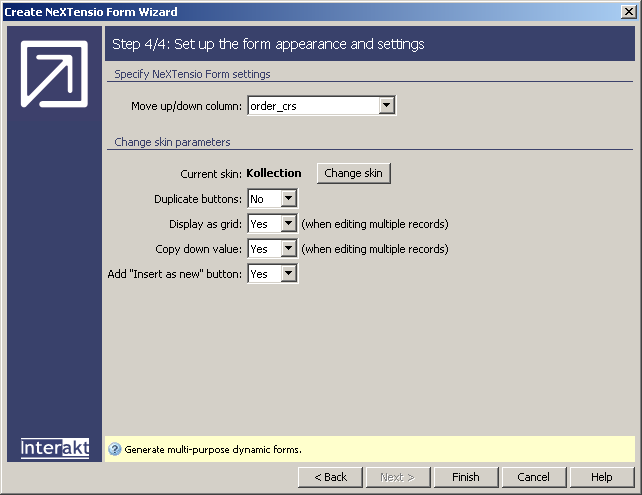
In the last step of the wizard, you can define form specific options:
In the Move up/down column, you have to choose the same column as in the NeXTensio list configuration. If user persistence is ON, this field will already be filled with the correct value: order_crs.
In the Duplicate buttons drop-down menu, select No. The form is simple, and displaying the insert/update and cancel buttons both on top and button would clutter it.
Leave the other options at their default values,
and click the Finish button to close the
wizard.
The wizard will add some HTML elements to the page, like input fields and buttons. It will also add the insert, update and delete transaction. Due to the fact that an order column has been specified, it will also add an Auto-increment column trigger. When inserting a new record, the value of the order_crs field will equal the maximum of all existing order values plus 1. This way, new records will be placed last in the ordered list.
Now you can save the page and move on to modify the NeXTensio list in order to add records on top of the list, instead of the bottom.