![]()
|
|
![]()
|
|
In this topic you will create and enhance a NeXTensio list that will display all users in the database. After the list has been successfully created, you will enhance it, by changing the way the access level is displayed: it will use labels instead of numeric values.
To create the NeXTensio list, follow the next steps:
Open the site index in Dreamweaver. If you have not created it yet, do it now. Also check that you have a working database connection that points to the database table mentioned in the previous topic.
Click on the Create NeXTensio List Wizard icon on the MX Kollection tab of the Insert panel to start the list wizard.
Configure the first step of the wizard as explained below:
Select the database connection defined earlier (connNumText)
Select the table to retrieve data from (user_usr)
Enter the page that will contain the NeXTensio form (the form creation will not be covered in this tutorial, as it serves no purpose within its scope).
Also set the number of records to display
on page (10)
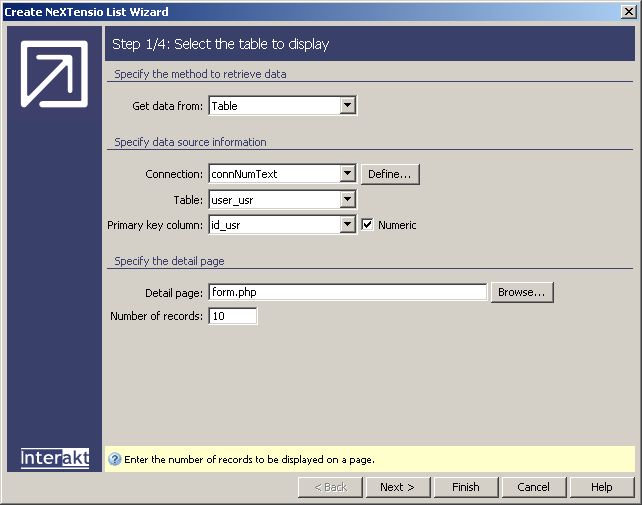
When all pertinent options are set, click on the Next button to move on to the second step of the wizard.
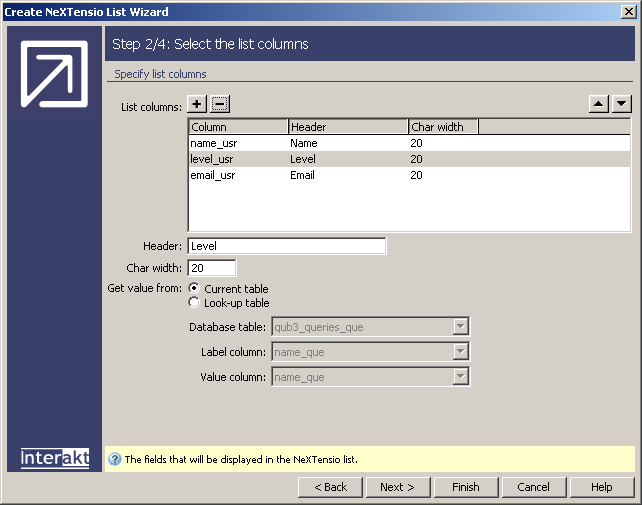
In the second step of the wizard you will have to define which fields will be displayed in the form, and their attributes:
In the List columns
grid, the
table columns that will be displayed in the NeXTensio
list are shown. Remove the password_usr column,
as it is not necessary to display. Leave the other columns at their default
values.
Now move on to the third step of the wizard, where you can define the filter element for each column
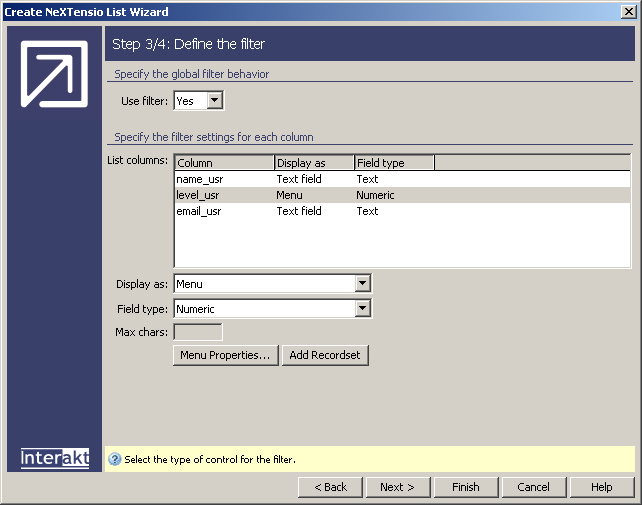
In the third step, you can configure the filter form elements that will be displayed for each table column. Configure the user interface as follows:
The name and email will use the default text field as filter element.
For the level, since there are only two options, you should not allow the user to enter a value in a text field. Instead, restrict its choices by using a menu. To change the element to a menu, click in the grid on the level_usr column. In the Display as drop-down select Menu. Two new buttons will appear: Add Recordset and Menu Properties. Since the options to display will not be taken from a database table, you do not need to add a recordset.
Click on the Menu Properties button to configure the menu elements. In the dialog box that opens, enter the first element label and value in the fields below the list. Enter Administrator for the label and 1 for the value.
To add a new element, click on the Plus (+) button on top of the list. Then fill in the fields below with label: User and value: 0.
The configured menu dialog box should look
like the following image:
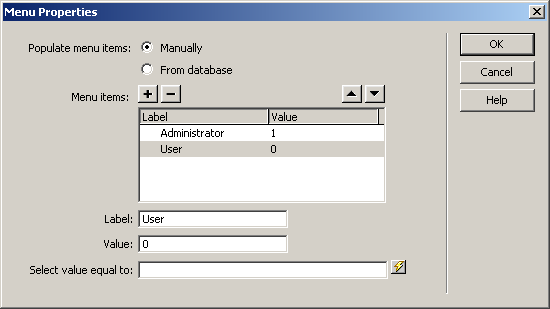
After adding both elements, click on OK to close the dialog box and return to the NeXTensio list wizard.
Since adding the menu was the only modification needed at this step, you can click on the Next button to proceed to the last step of the wizard.
In the wizard last step, select options that concern the list look and feel:
Select the column to order list elements by (name_usr).
Select the skin to use. If you hadn't made a skin selection in control panel (CSS Skins) or in other interfaces that you completed in this site, then no skin is defined, and you can make your choice right now.
Decide whether to duplicate navigation and
buttons, or to use buttons instead of links (this is entirely up to you
as it does not affect the list's functionality)
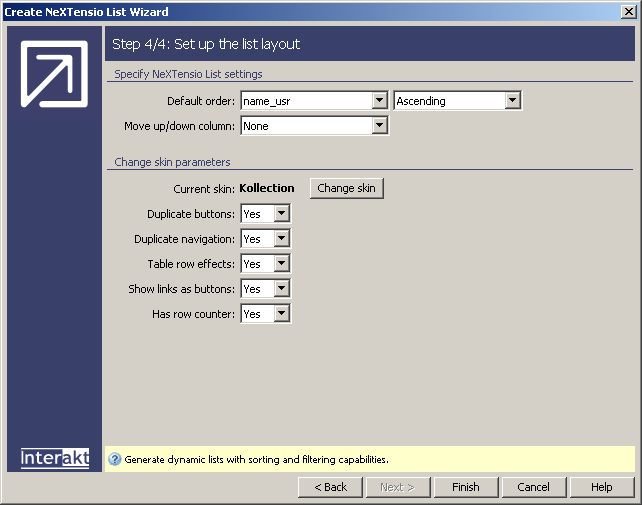
At this point you can click on the Finish
button, save the page, upload it to the server (together with the includes
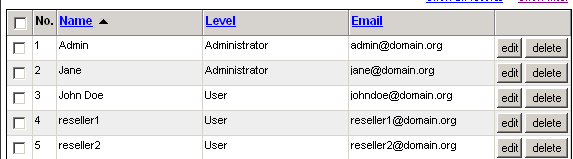
folder) and preview it in the browser. It will display the user list.
The access level is displayed as a number however (see below).
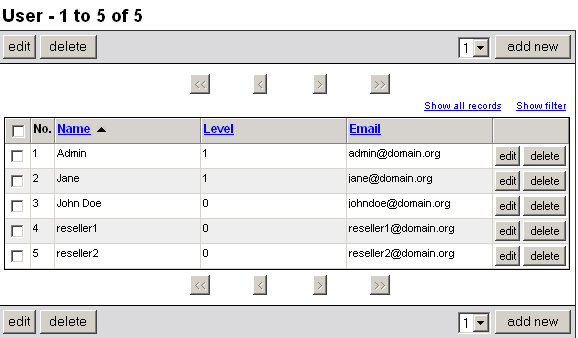
Next, you're going to correct this, and make the list much more clear, by replacing the number with administrator or user, depending on the value. To enhance the list, follow the next steps:
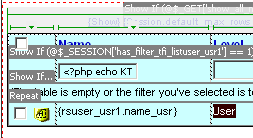
In the NeXTensio
list, select the dynamic text that contains the user level (in the fourth
column):
Now delete the selected text. Press the delete
key. In the empty place, type the label for users with the access level
0 - in this case, it's simply User. Select
the entered text:
Apply the Show If Conditional Region on the selected text. You can access this server behavior from the Servers Behavior tab > + > MX Kollection > Conditional Regions.
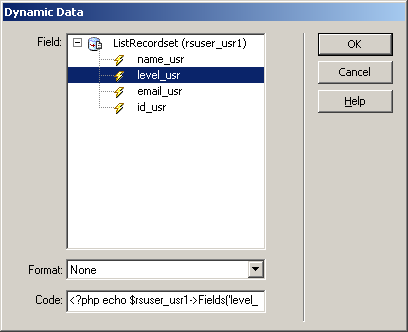
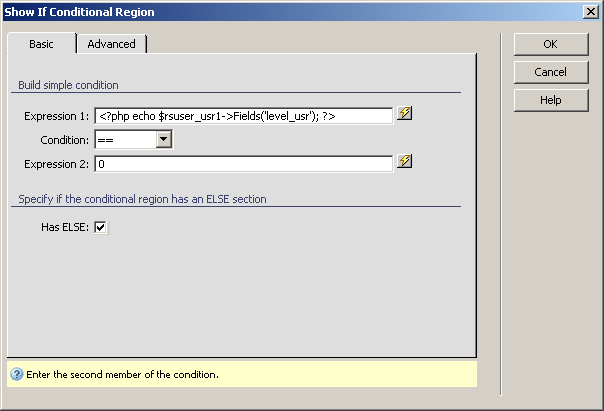
In the dialog box that opens, you have to define
the condition to evaluate. For the first member of the expression, use
the dynamic data icon to select the field storing the access level of
the list recordset:
The operator is the equality condition (==). Select it from the drop-down menu between the two expressions.
In the second expression's text field, enter the value the level should equal to display the entered text. In this case, it should be 0.
To allow displaying an alternate value if the
condition is not met, also check the Has ELSE
option.
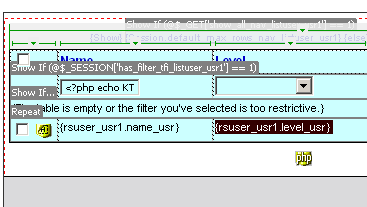
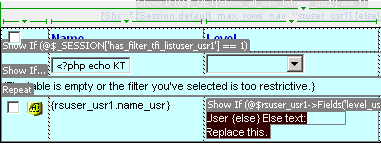
In Dreamweaver, a translator is now shown around
the text entered at step 2. Some new text is displayed next to the else
translator: Else text: Replace this.
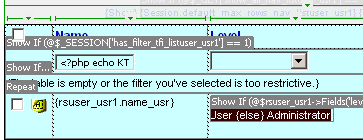
Now it is time to add the Administrator label. At the beginning of this tutorial, there has been established that only two user levels will exist: 0 and 1. Therefore, if the dynamic field does not equal 0, it must be one. Based on this simple principle, the Administrator label should be displayed when the User one does not.
Replace the else text added by the conditional
region with the Administrator label.
This is the only change you need to make in order
for the list to display elements other than the default. If you save the
page and preview it in the browser, you will see labels instead of numbers:
In this tutorial you have learned how to customize the NeXTensio list in order to display information the way you need it.