![]()
|
|
![]()
|
|
On the left side of the MX Query Builder
interface you'll find the Tables panel where
you can find the tables from your database connection.

By clicking on the checkboxes associated with each table, you can bring
them into the Database Diagram:
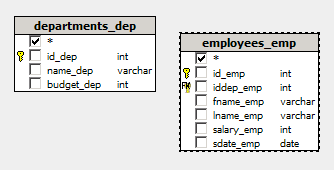
You can move the tables around by clicking on them and dragging the mouse. Other elements of the database diagram are:
Table name: the table name appears in a gray box across the top of each box representing a table. This way each table can be easily identified within the diagram.
Table columns: a list of the table columns appears beneath the table name as well as an option to select all the columns. The column name appears exactly as it does in the database.
Checkboxes: next to each table column is a checkbox. The checkbox lets you add the column to your recordset. Upon checking the checkbox, the column name will appear in the Query Management Panel.
Data type: to the right of each table column there is the variable type for the column, useful for determining the type of comparisons to use in the Query Management Panel.
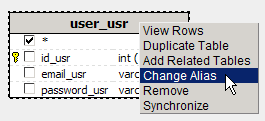
The Change Table Alias option can be used
to make the table names more readable in the Database
Diagram. It is especially useful when dealing with lots of tables,
or copies of tables using self foreign keys. To use this option, put the
cursor inside a table, and right click - the following menu will appear:
After clicking the Change Alias option,
a simple interface appears:
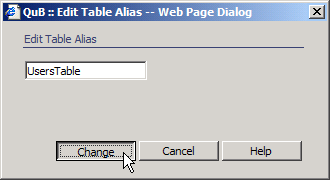
Just enter a new name for the table, and click Change.
Now in the diagram, the table will have a new heading:

Keep in mind, that changing the alias does not change the actual table name, just it's header in the Database Diagram. To change the table's name in the database, you must use your database management software (MySQL, MS Access, etc.).
The diagram also allows you to manage table relations. In the next
section, you'll learn more about working with table relations in MX Query Builder.